Quantcast
Channel: String Theory Crochet
Viewing all 226 articles
Browse latest View live

Birds, Crochet Bunny Basket and Chicks

$
0
0
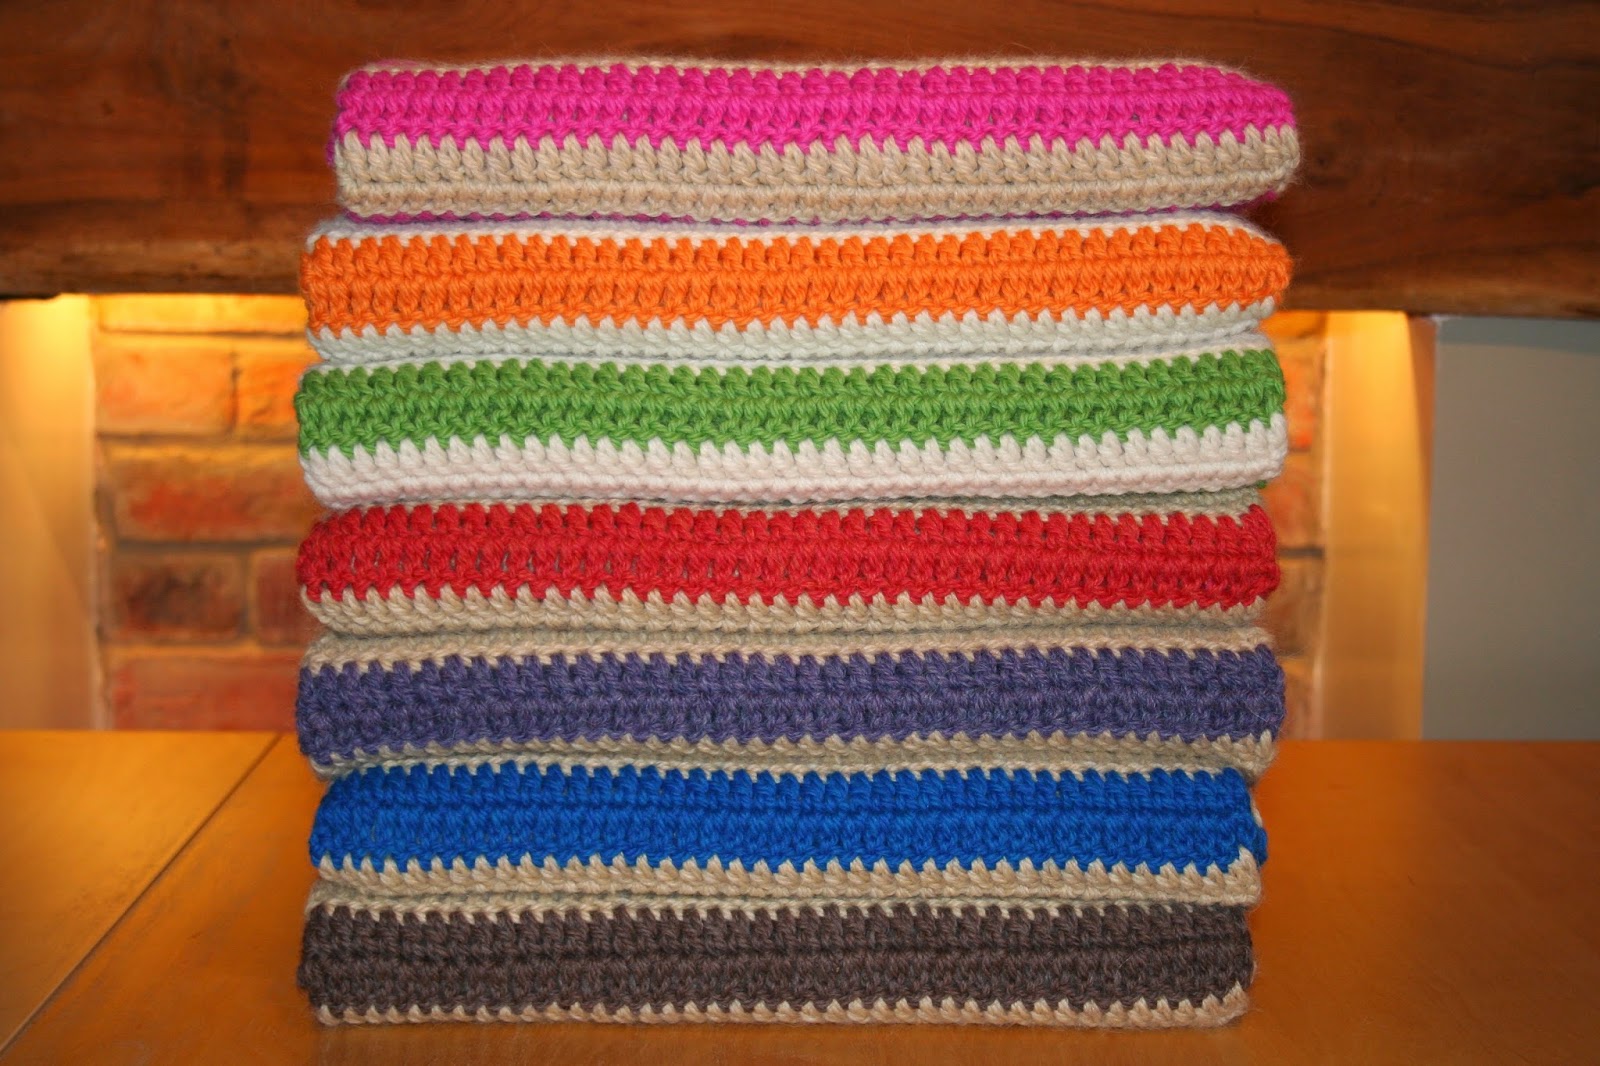
This is another of my Christmas presents, from Matthew this time.


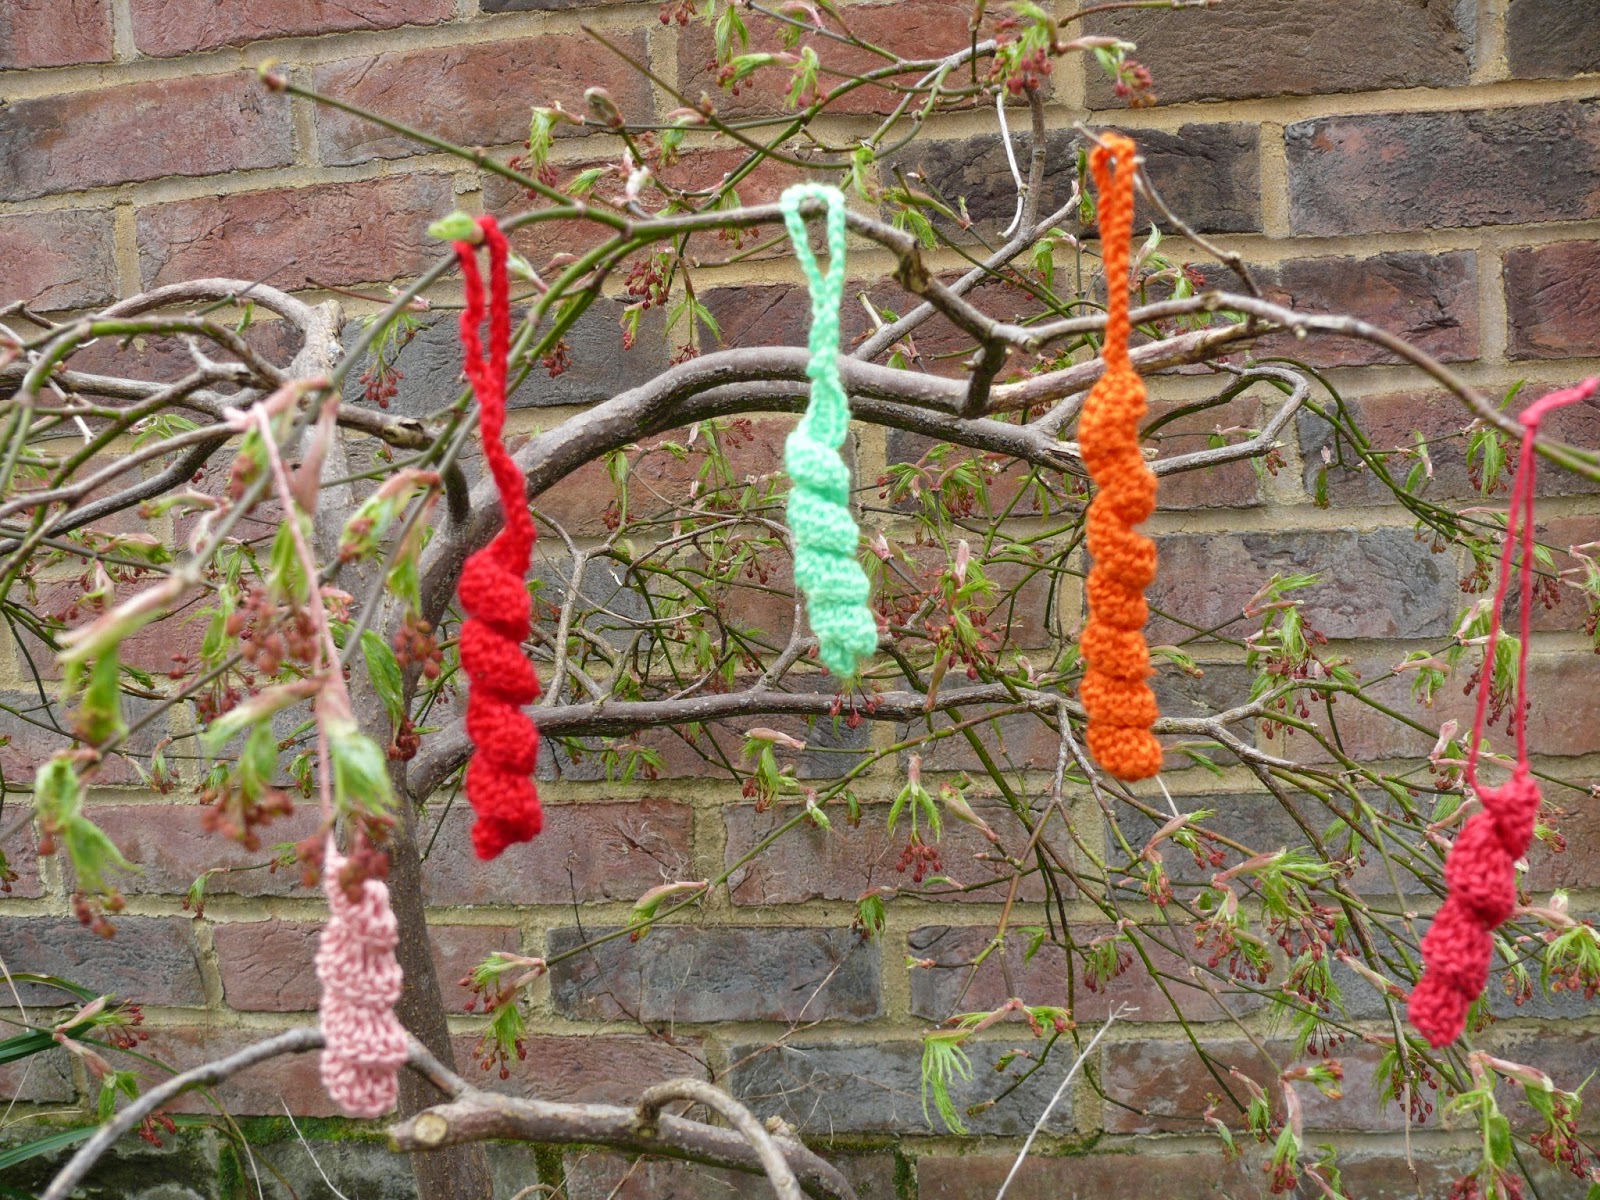
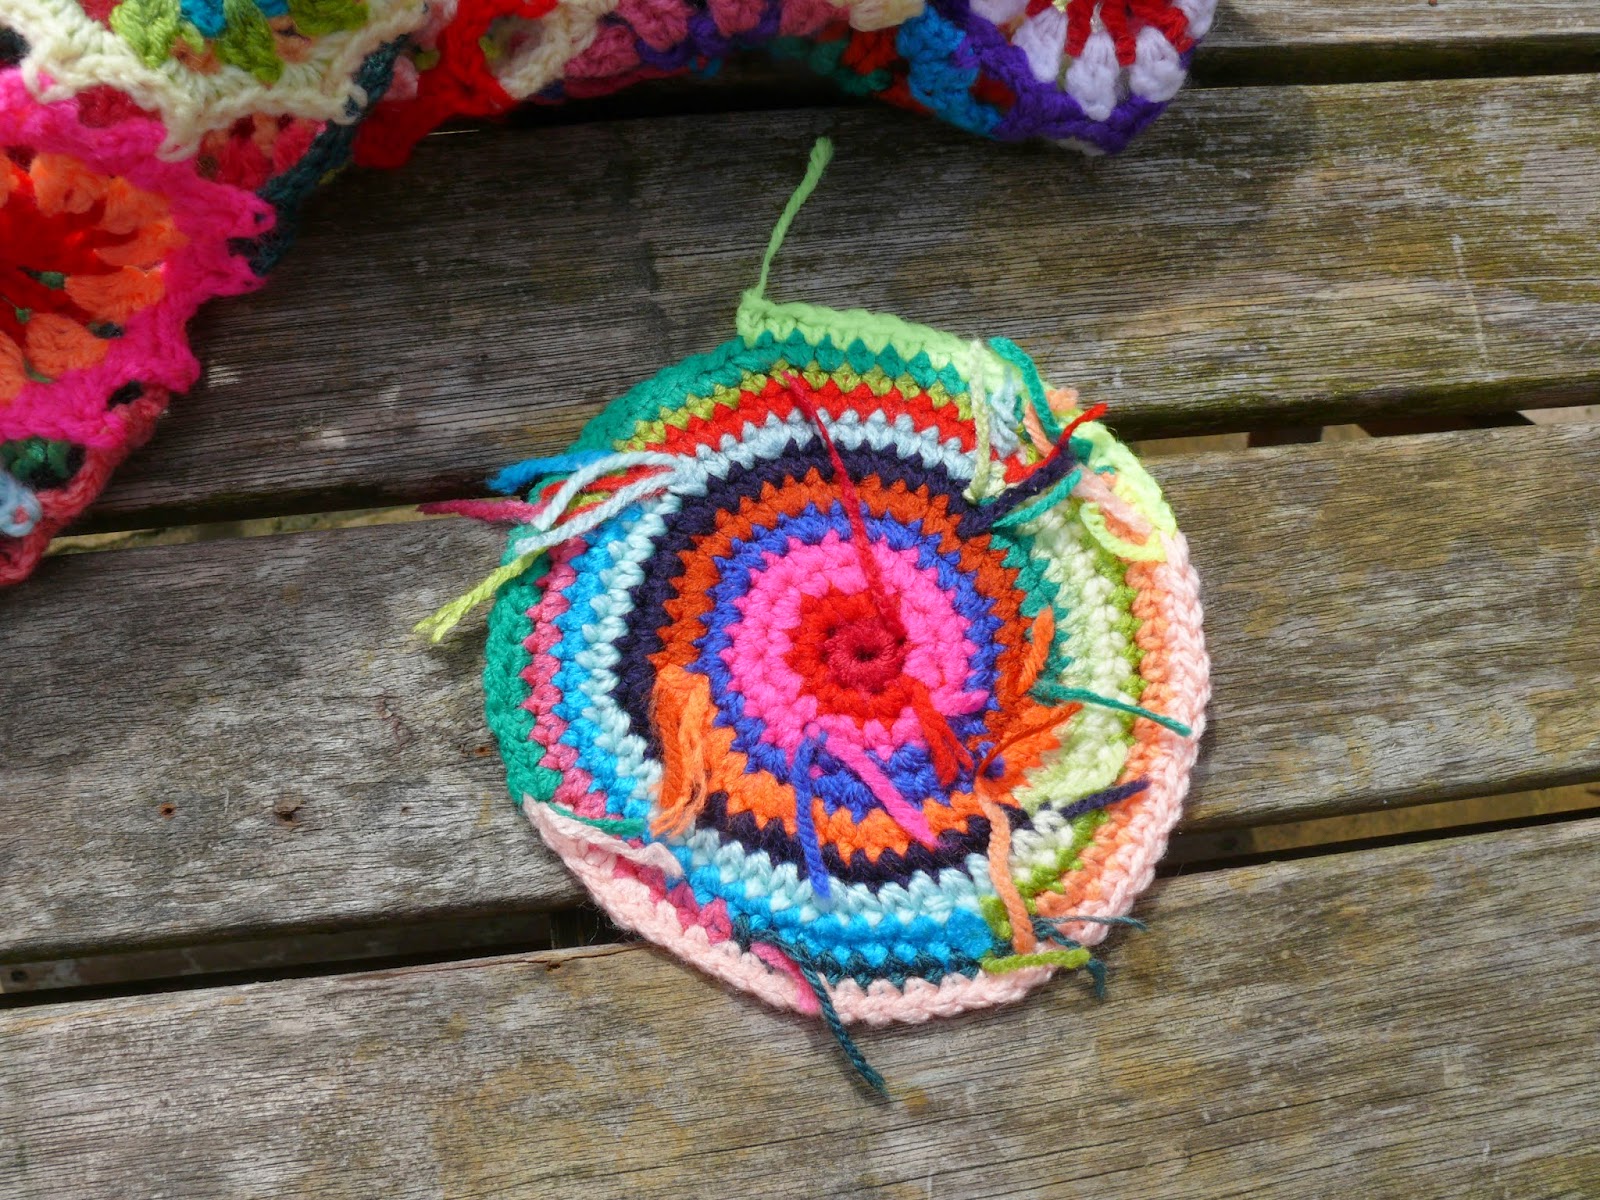
This is my bird tree, apart from seeds and nuts the orange thing is a crochet bag full of some of the bits of yarn that I have cut off in the last few weeks. I can't remember where I got the idea but I have done this for a few years now and the birds seem to love it for there nests. I keep imagining the nests lined with red acrylic, yellow cotton and purple wool - very cosy even if the colour scheme leaves a lot to be desired!


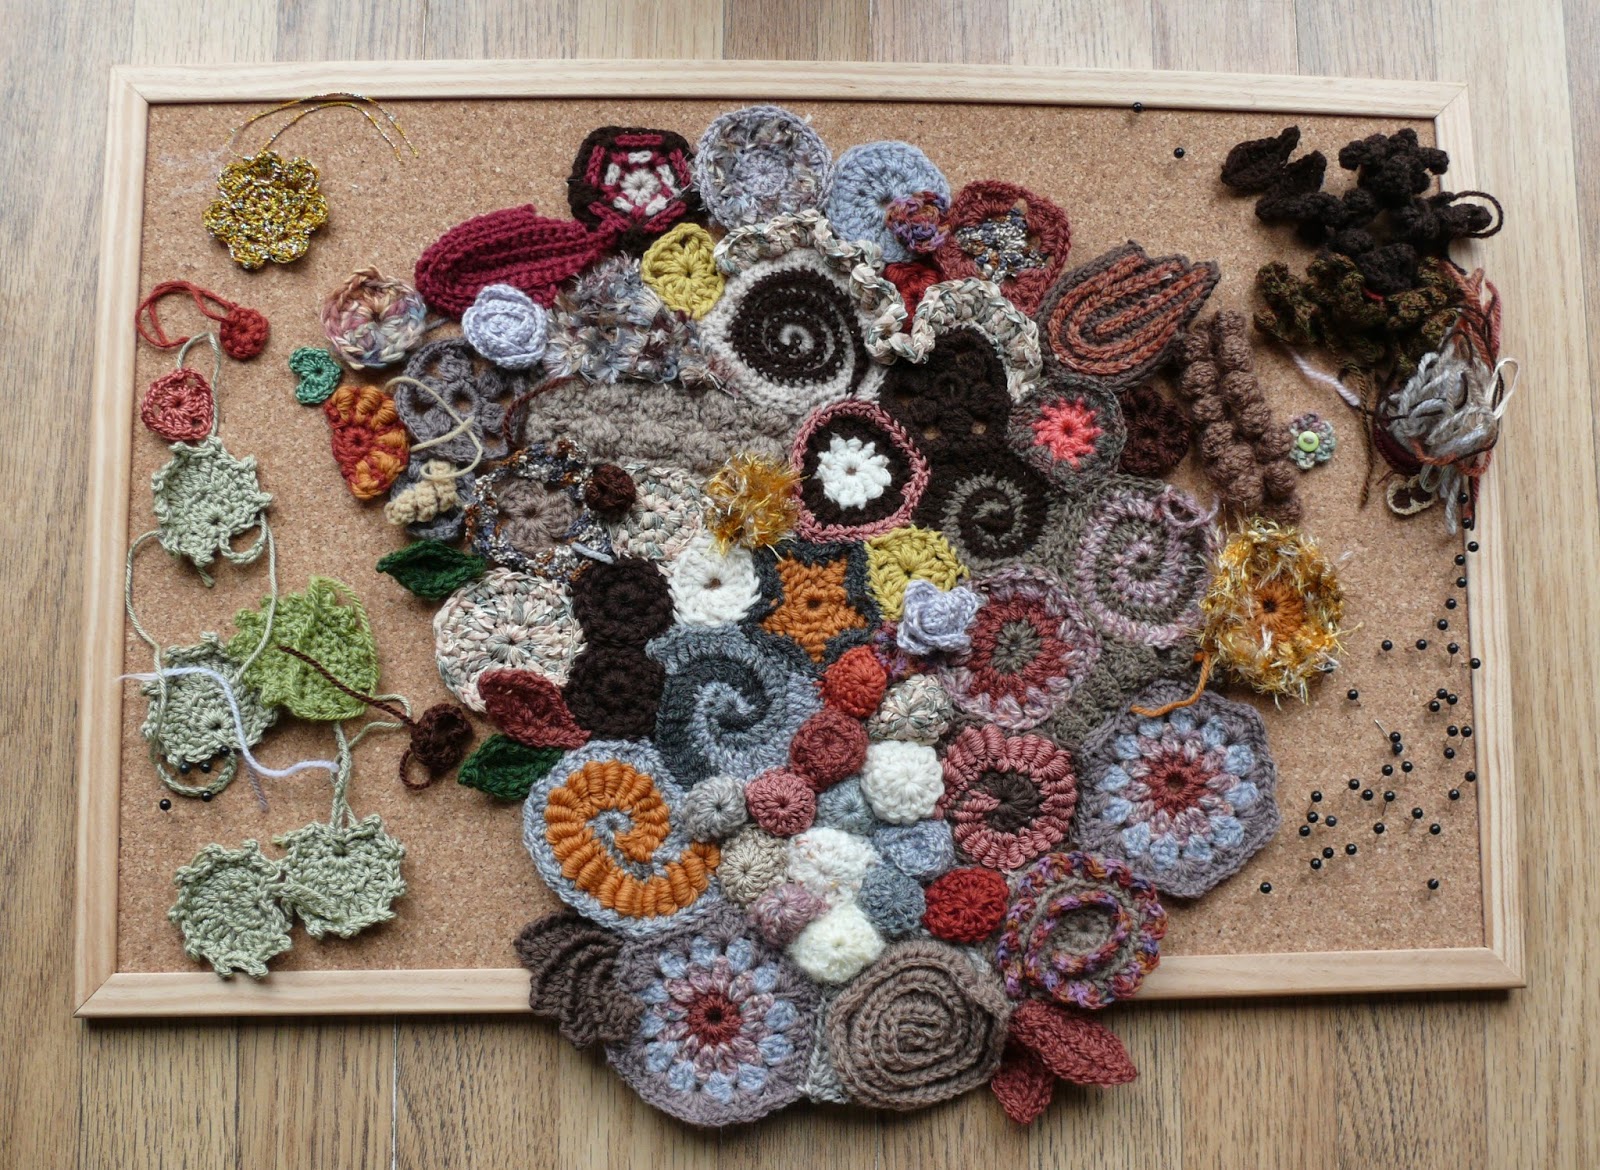
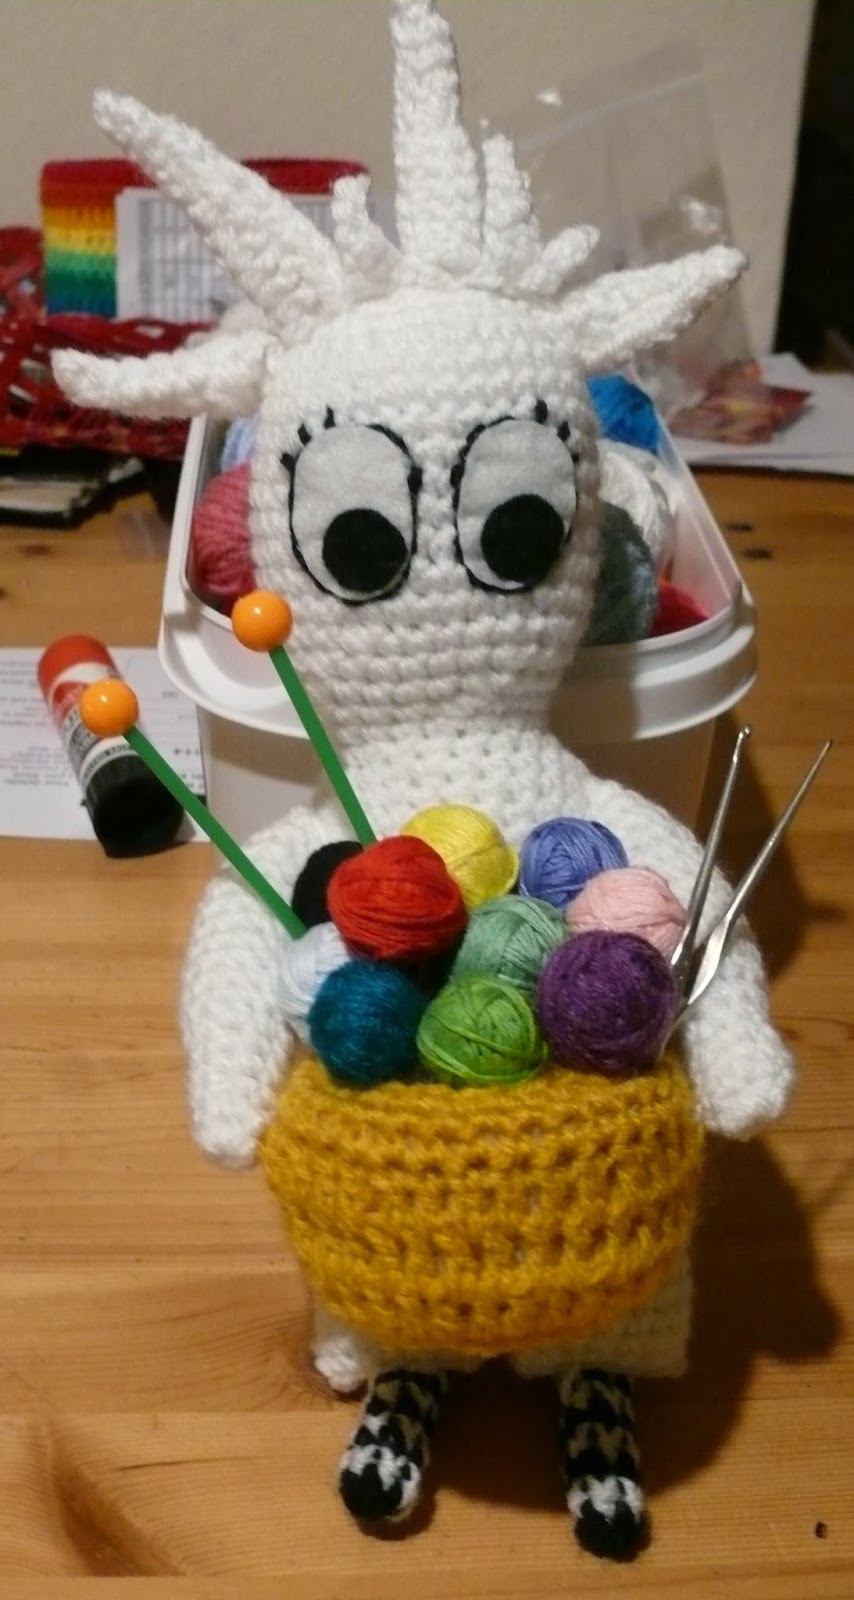
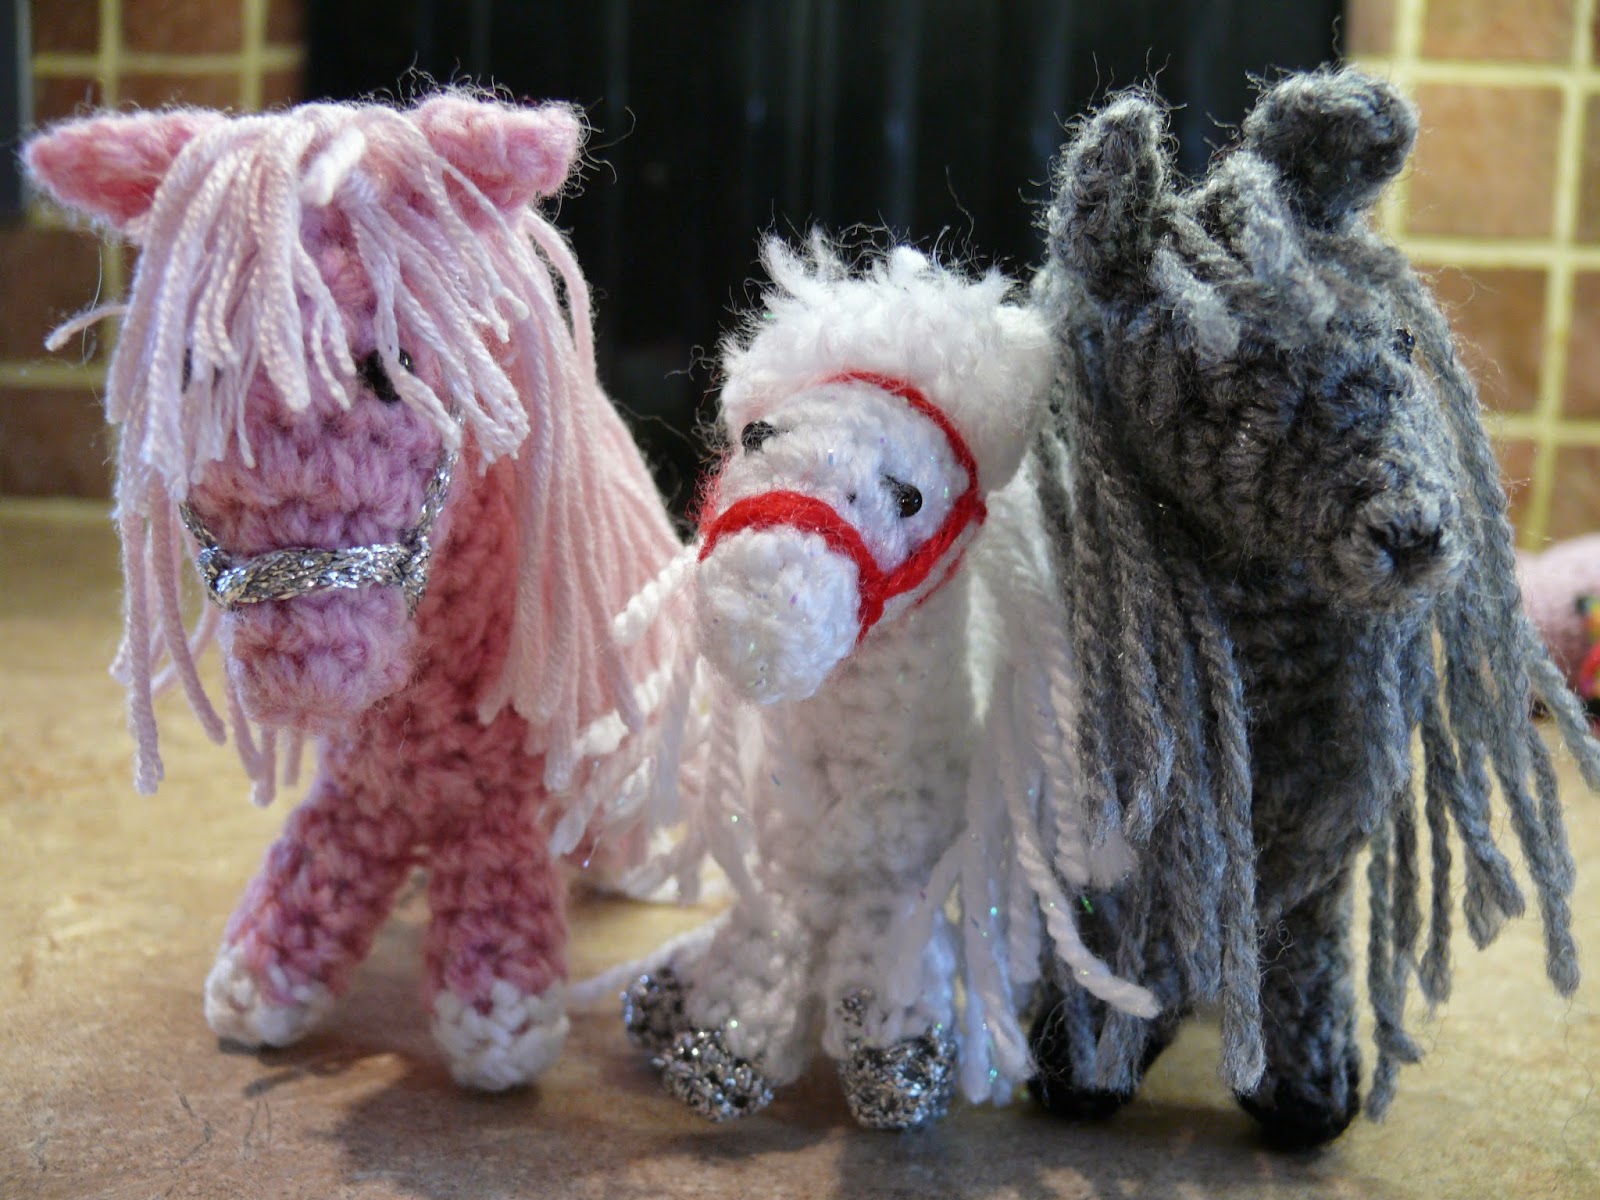
I sometimes think that Vicky and I share some kind of mind link. While she was putting the pattern together for her Easter baskets I was doing almost the same on a much smaller scale.


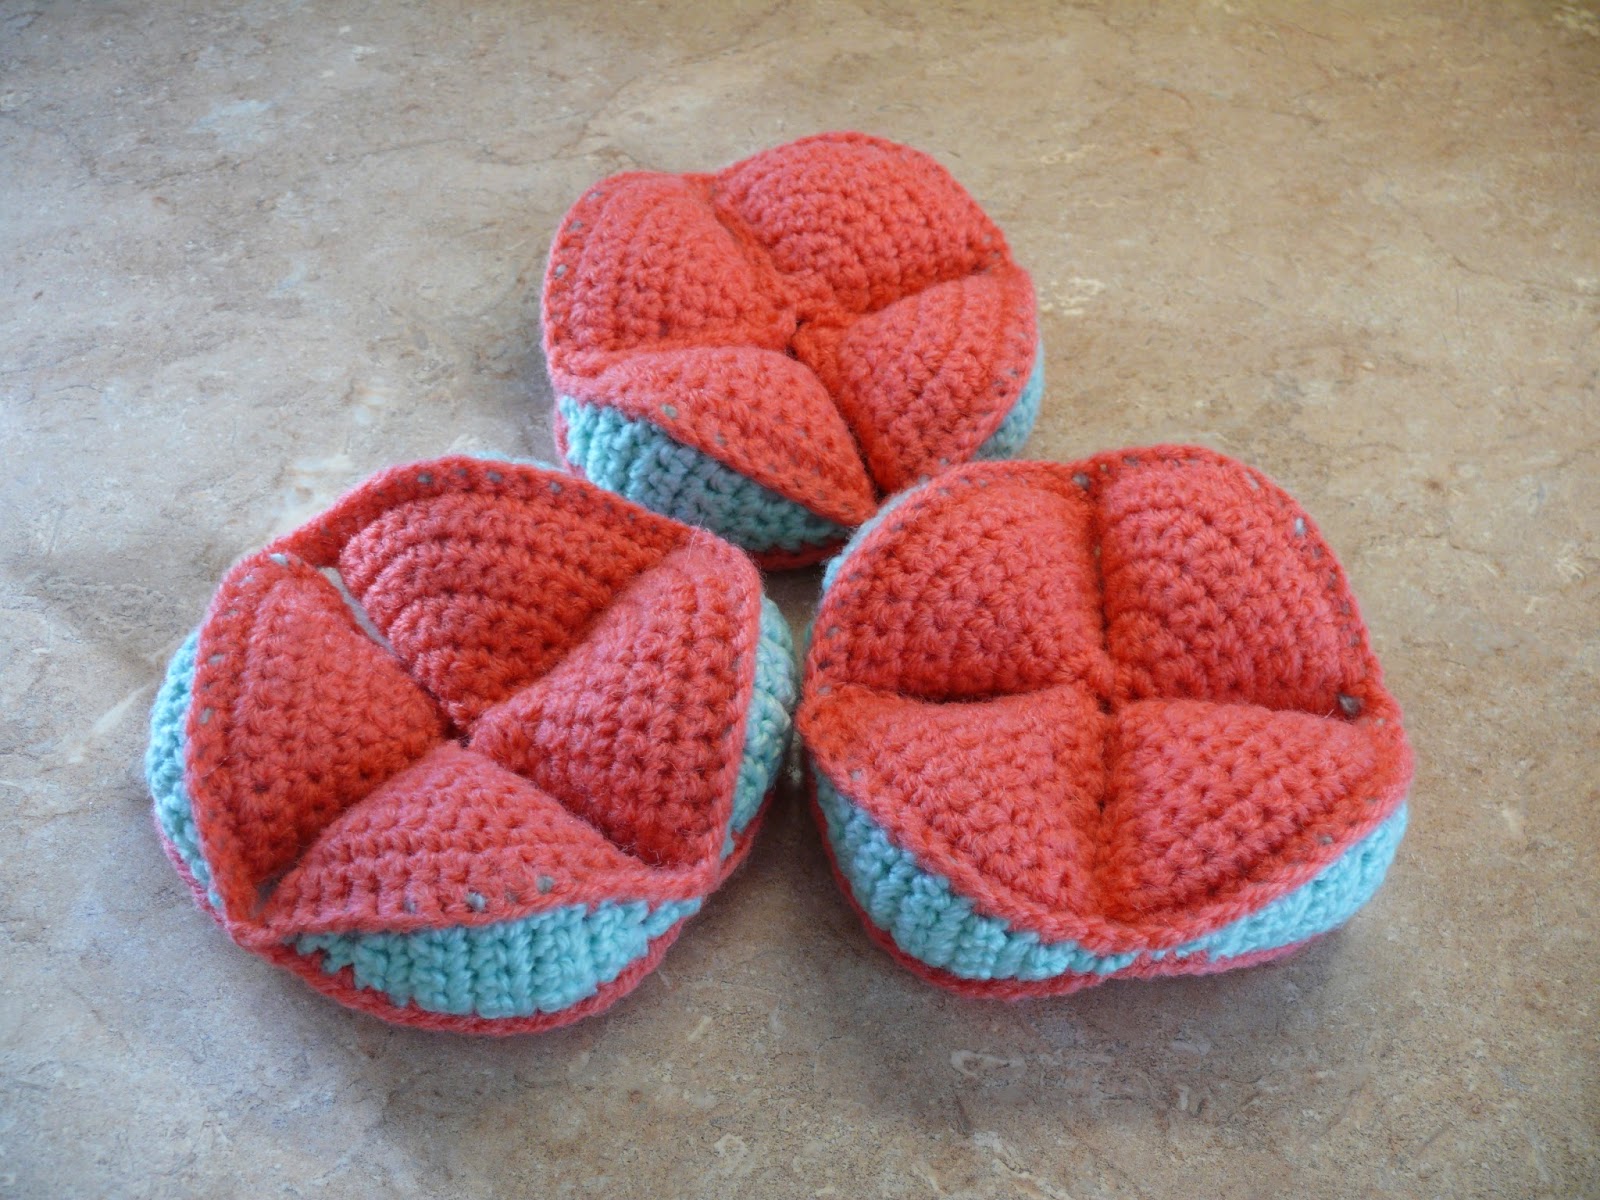
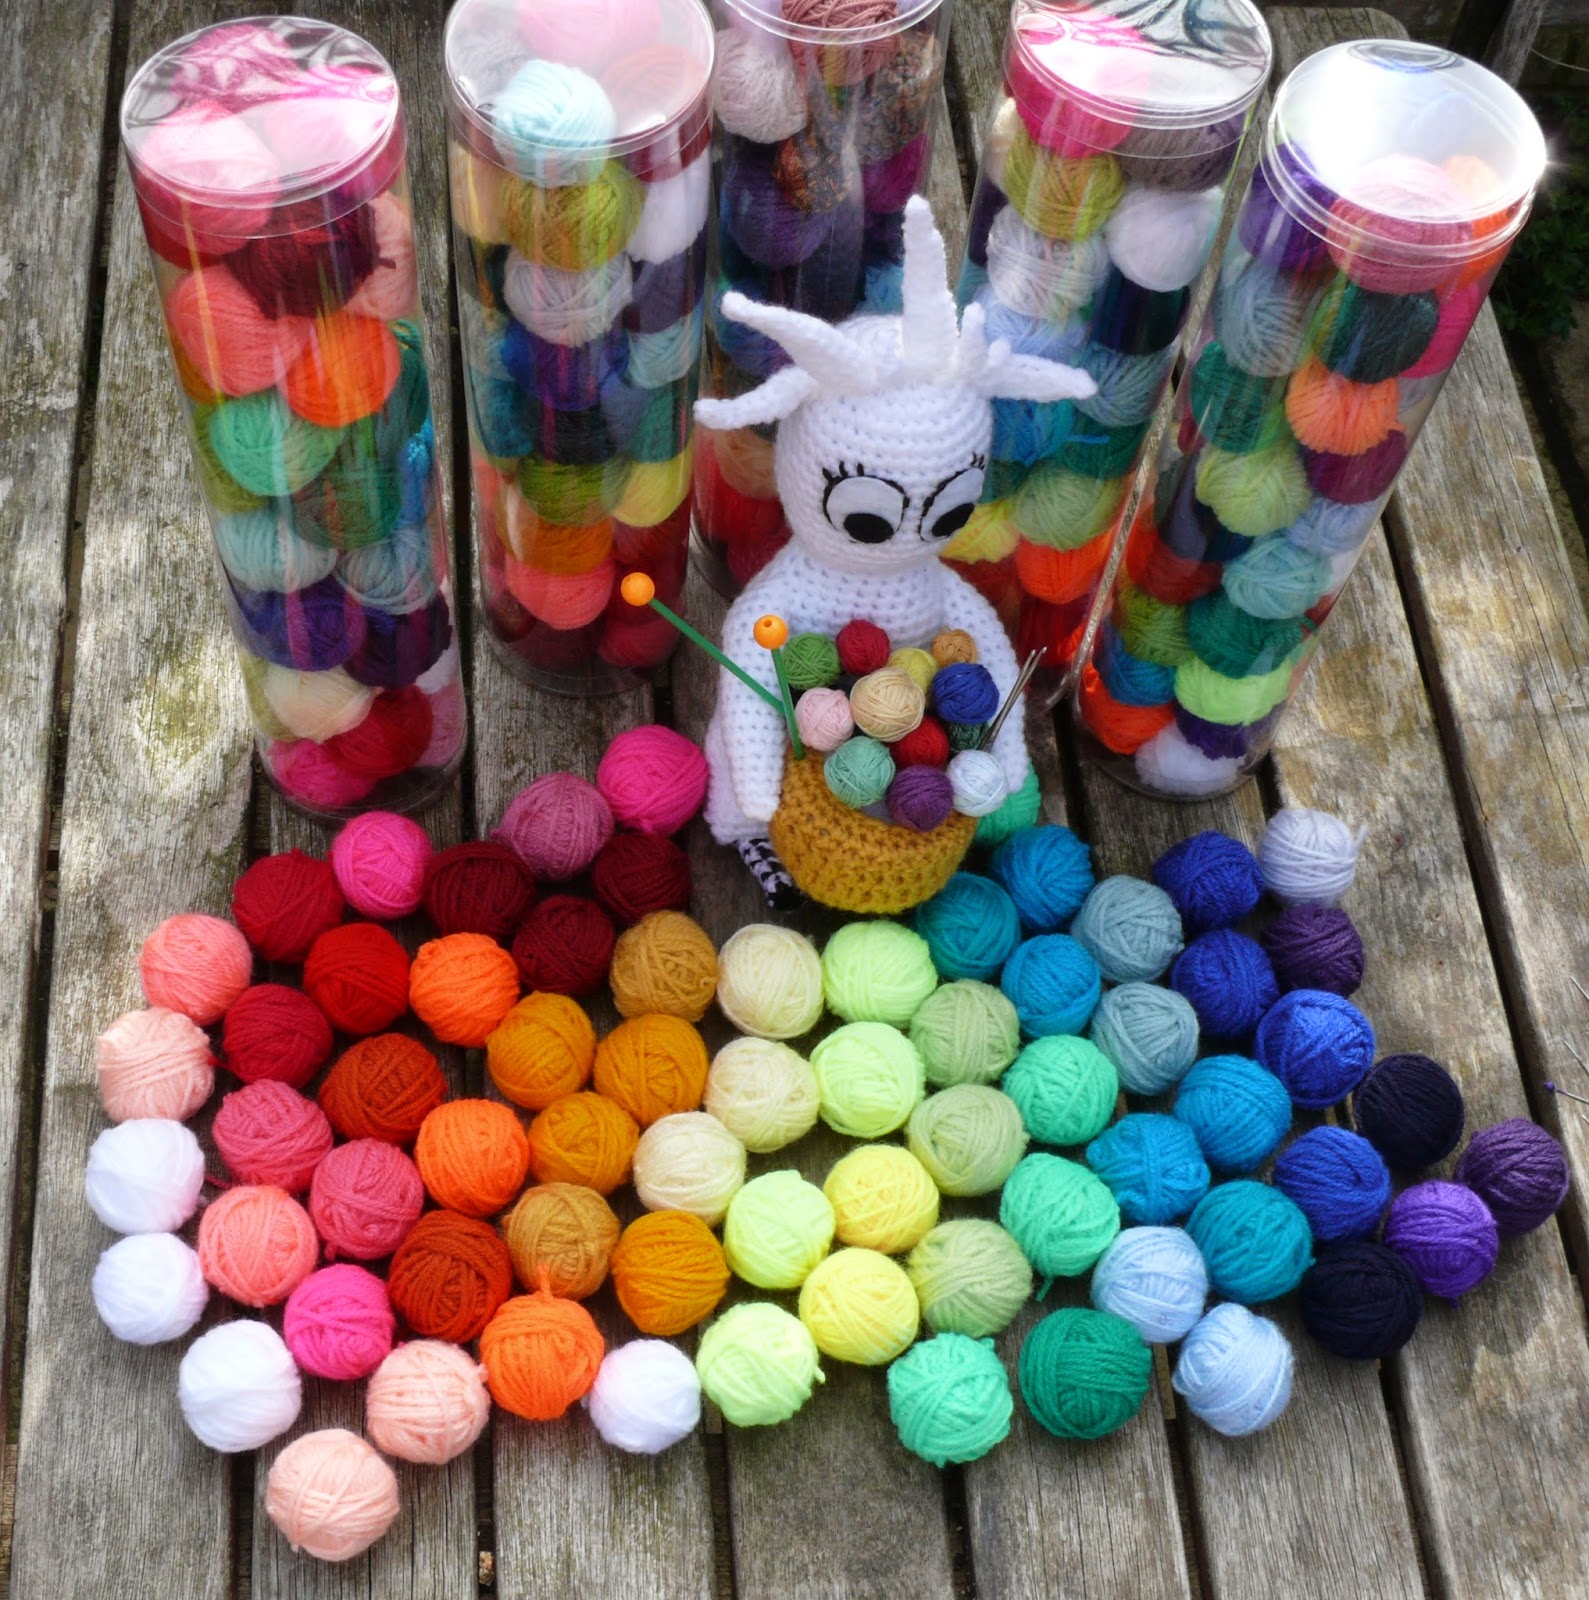
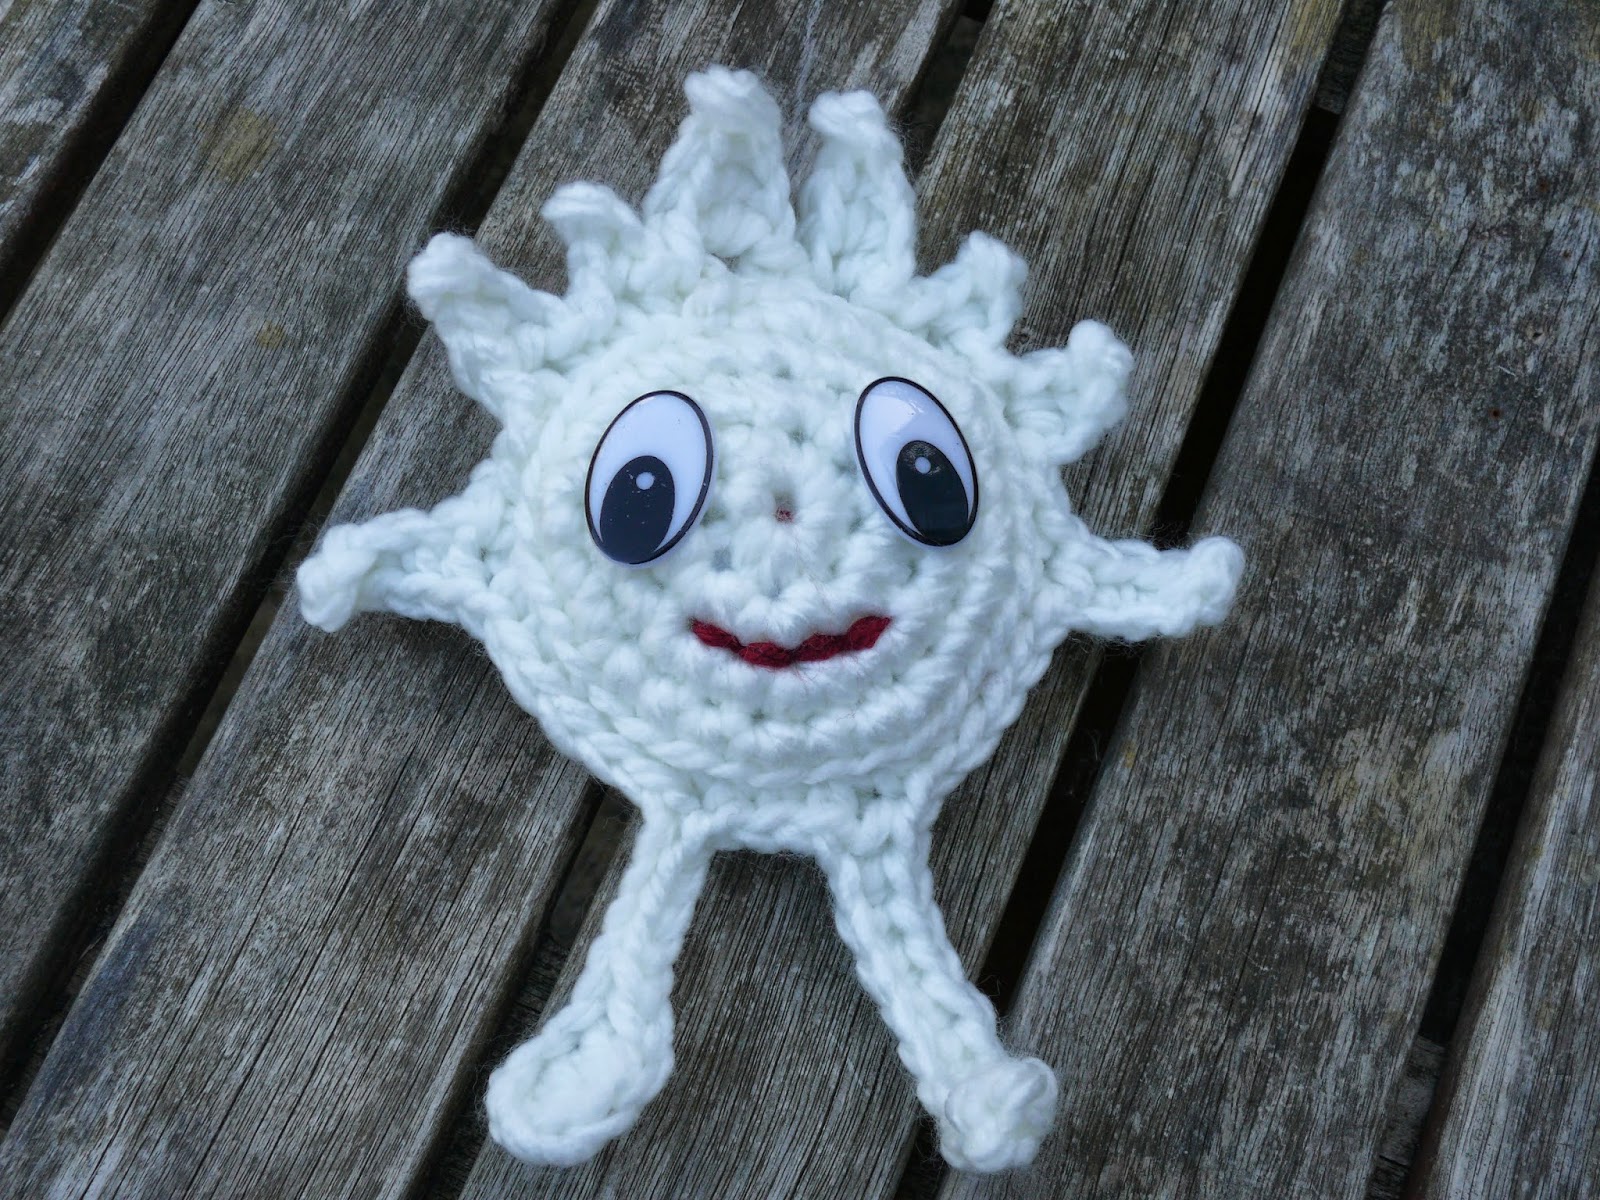
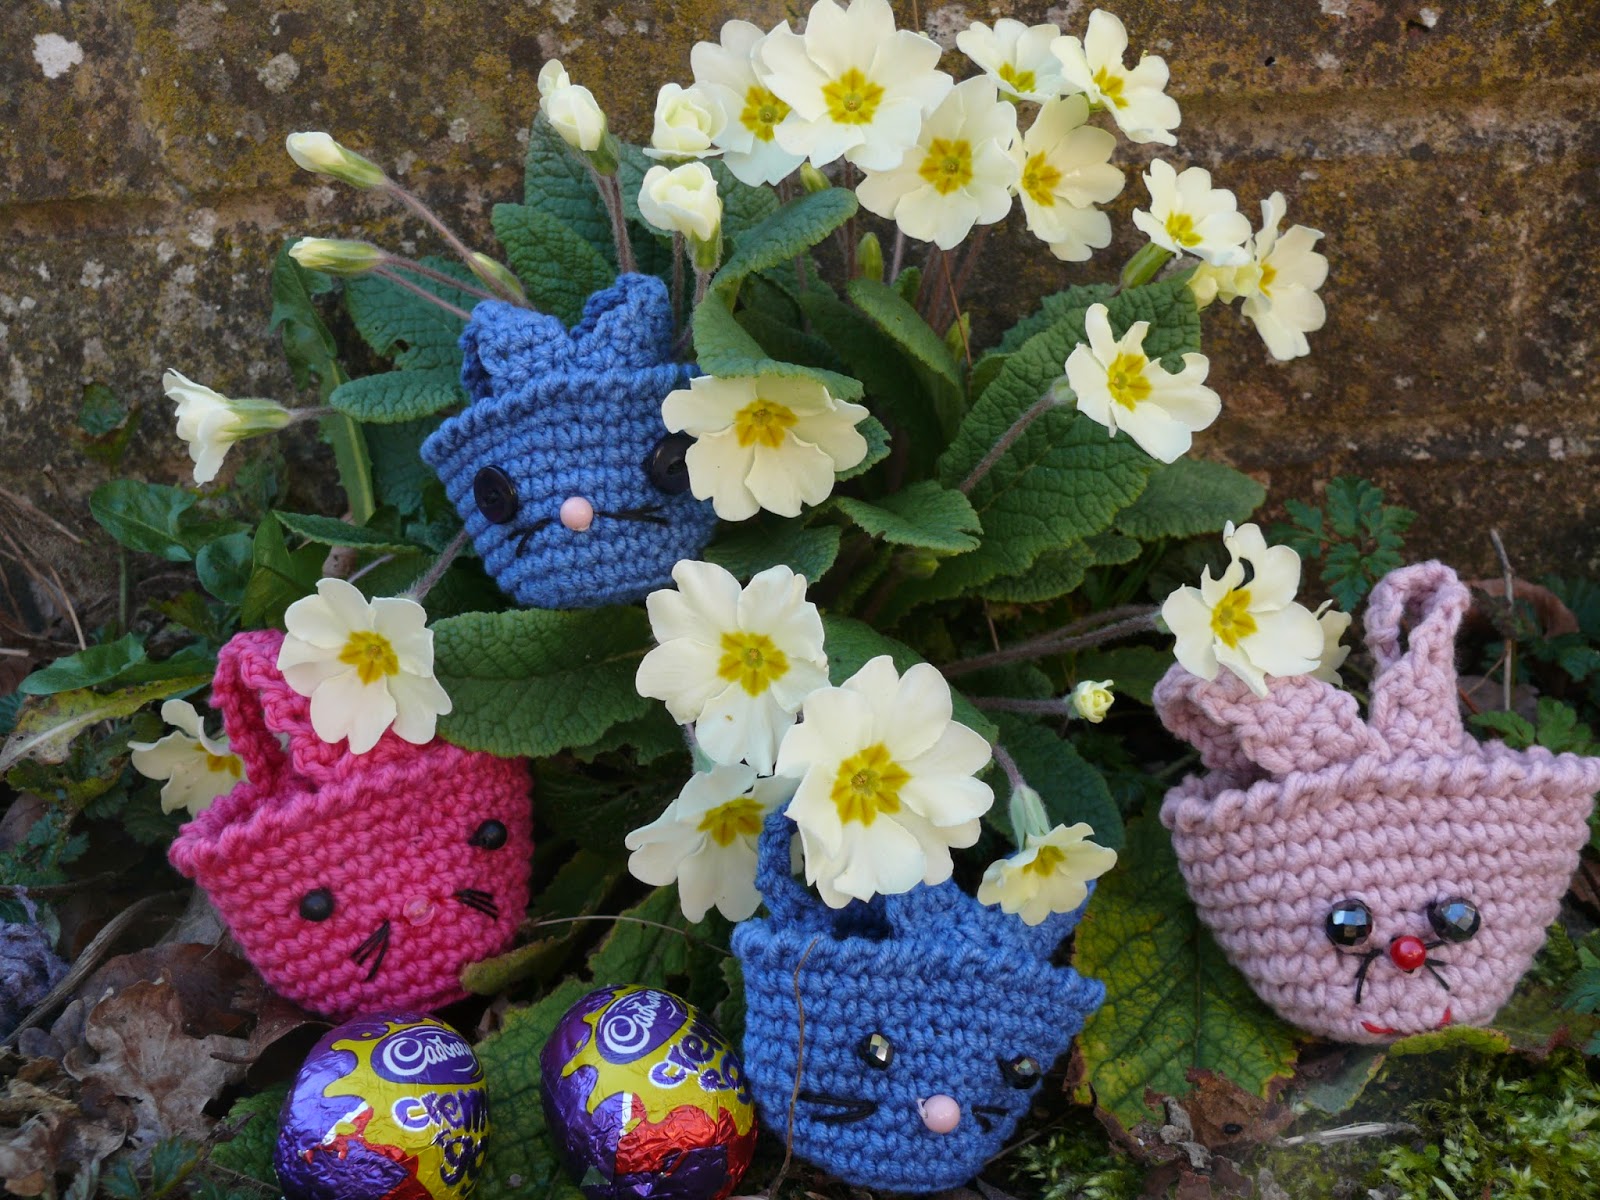
The first two pictures are me trying to make the photographs look better by means of a small clump of primroses and a wall. Not as successful as it could have been because the primroses are much prettier than the baskets. The third picture shows how the baskets evolved as I tried to get the face right. By the time I got to the white one they had stopped looking like an elderly man without his teeth so I decided to branch out and try a chick. I need to do something about the chicks beak so there will probably be another one of these next time.

 These are the best so far.
This was my plan all along. To make them just the right size for eggs. My particular favourite are the mini eggs but they have somehow disappeared - can't imagine how!


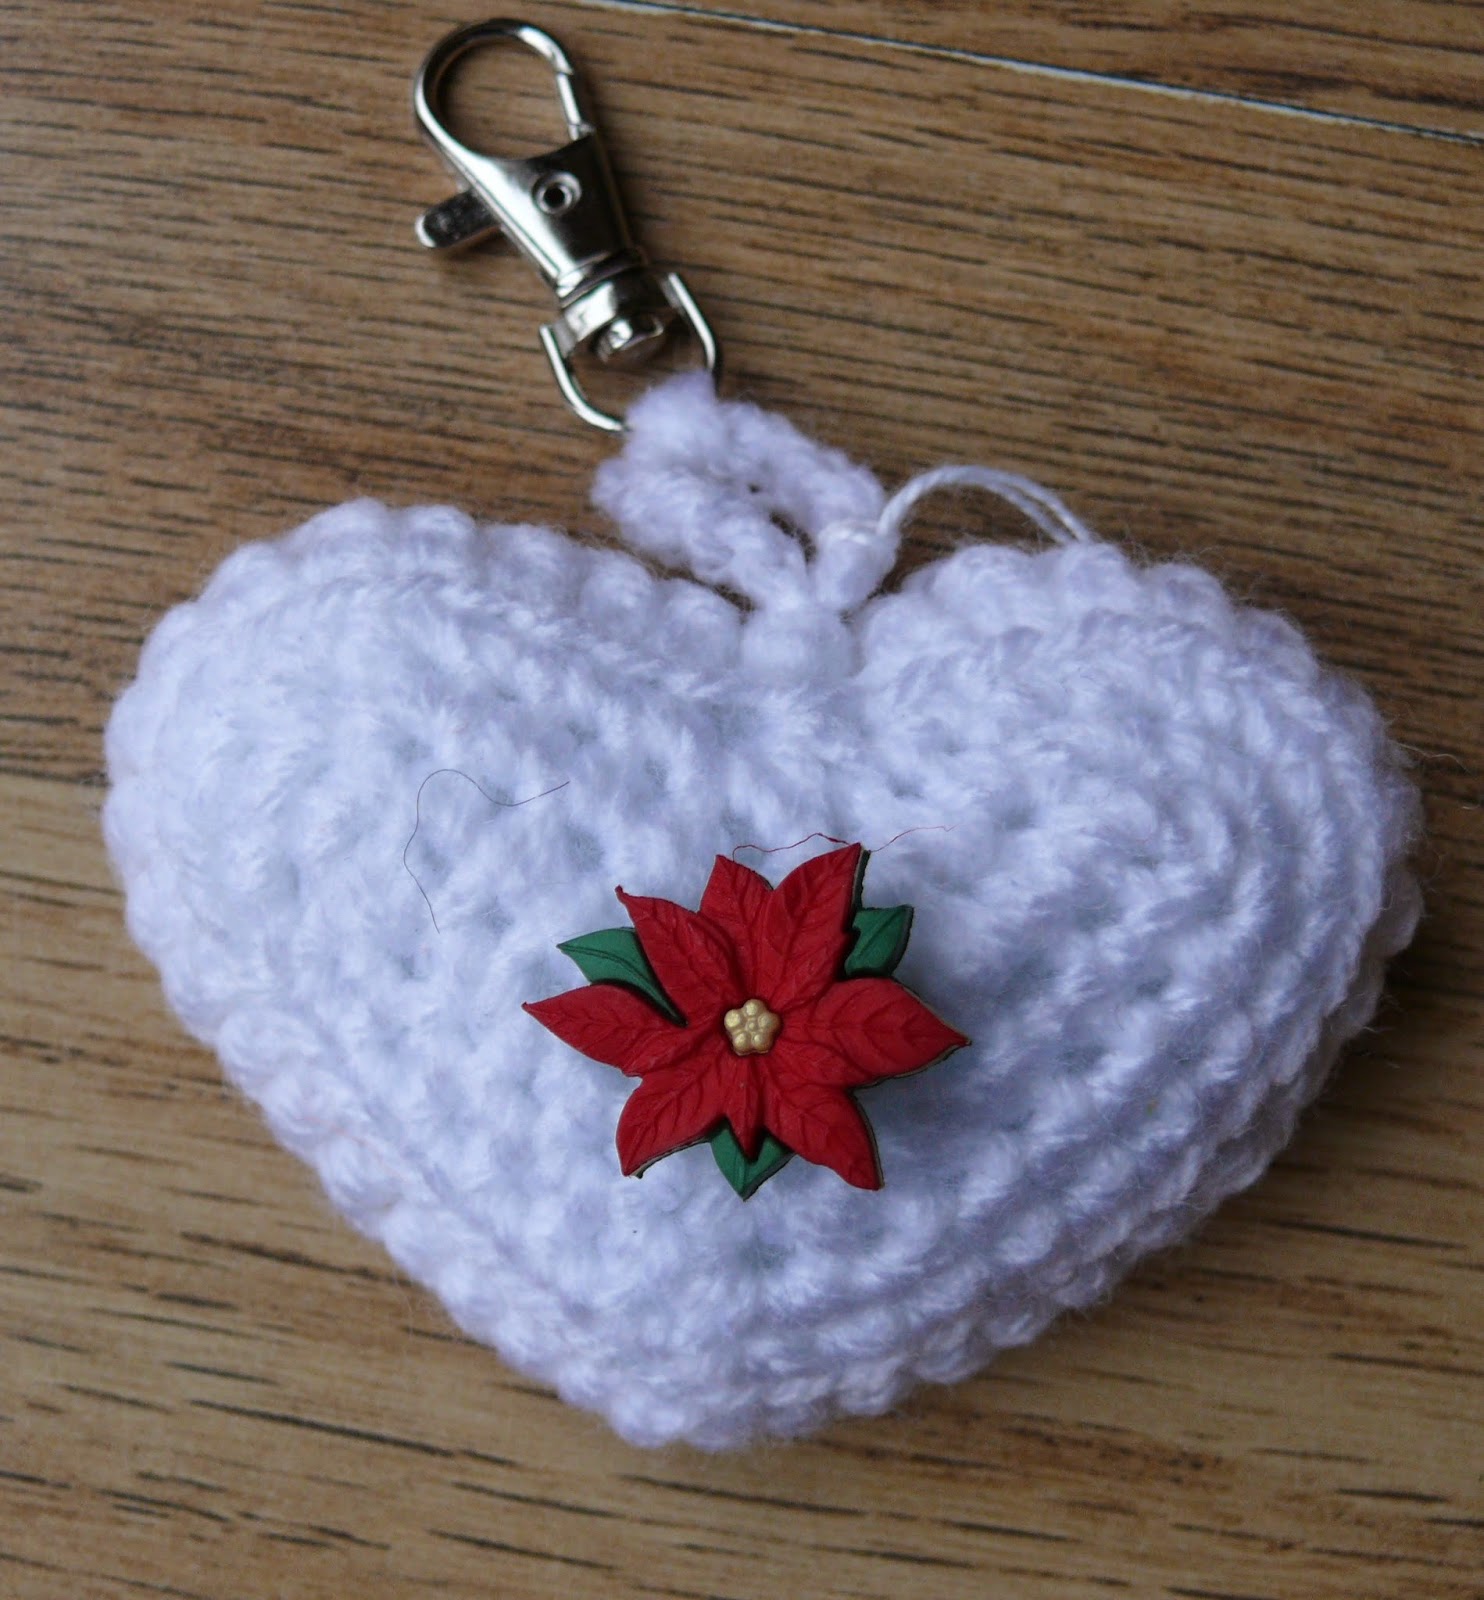
Then I thought what about a grown up version for a tiny Easter gift or the 'ring' or something. So here are some ideas.

With primrose brooch.


With violets brooch


With a tiny red flower which could be exchanged for a heart or a butterfly.


As usual I have a million ideas but not enough time to implement them all. I will publish the pattern for the bunny baskets next time.
It has just occurred to me that there is something a little strange about a chick carrying eggs - aren't they his brothers and sisters?
Lynn


Tiny Bunny Basket Free Pattern

$
0
0
In our last post I promised to publish the pattern for the bunny or chick basket. Have a look at the previous post to see the possibilities but here is the pattern.


Materials: a very small amount of yarn. I used cotton double knitting and a 3.00 mm hook.
If you change the yarn change the hook so that you get a fairly firm fabric.
I made the eyes using white felt and two small blue buttons but there are other methods in the previous post. You will also need a small pink bead for the nose and some black sewing thread.

 Make a magic circle and ch1 this does not count as a stitch.
Row 1: make 8 dc in the circle and join with a ss to first dc.


 Row 2: 1ch and 2dc in the same place as the join. 2dc in each stitch to end of row this should give you 16 dc.
Row 3: 1ch and 1dc in the same place. (2dc in next stitch 1dc in next stitch) repeat this 6 more times 2dc in the next stitch. NOTE join to first dc using only the back loop. (24 dc)
Row 4: 1ch and  using only the back loops throughout this row 1dc in same place 1dc in each stitch to the end ss into first dc
Row 5: 1ch and 1dc in the same place 1dc in each stitch to the end of the row join with a ss.


 Row 6: 1ch and 1dc in the same place 1 dc in next 6 stitches 2dc in next stitch. ( 1dc in next 7 stitches 2dc in next stitch ) repeat this once more and join with a ss. (27 dc)
Rows 7 and 8 repeat row 5
Row 9: 1ch and 1dc in the same place 1 dc in next 7 stitches 2dc in next stitch. ( 1dc in next 8 stitches 2dc in next stitch ) repeat this once more and join with a ss. (30 dc)
row 10 and 11: repeat row 5

Row 12: you can work either a row of slip stitches all round before fastening off or a row of crab stitch

This is what crab stitch looks like.


EARS/HANDLES make two
ch 4
Row 1: work 1dc in second ch from hook then 1dc in remaining two ch.
Rows 2 to 7: ch 1 work 1dc in each stitch (3 dc)

If you are making a chick ignore rows 8 on wards and just repeat row 2 another 10 times.

 Row 8: ch 1 dc two tog. 1dc  (2dc)
 Row 9: ch1 dc 2tog.                (1dc.)
     Row 10 to 16:  ch 1 1dc turn Fasten off
 To Make up.: Weave in loose ends. Stitch ears as shown in the photo and then stitch them to the inside of the basket NOTE try to have the seam of the basket at the opposite side to the ears.

Stitch the other end of the ears to the back of the basket and your basket is complete it is up to you how you decorate it and what you put in it.

If you are making a chick sew the handle on from side to side rather than front to back..


Chick wings: ( make two )
chain 5.
dc in second chain from the hook dc in each chain to end (4 dc)
ch 1 dc 2 tog dc in each stitch to end (3 dc) . Repeat this row twice more and fasten off. Stitch the wings about half way down the basket sides directly underneath the handle (on either side ).


Use the photographs in this blog and the previous one as a guide to how to make the faces
Or you could decorate with small flowers or beads.

As I keep saying I am out of my comfort zone when writing patterns so if you need any help please get in touch.
Lynn

Freeform. Scumble or Scrumble Crochet or Where's Granny

$
0
0


I have a new addiction - free form. It suits my personality because I can make small motifs and shapes and it panders to my love of colour. For those new to crochet you can make any shapes and the edges don't even have to be straight, for those who have been crocheting for a long time, you will no doubt have a box full of bits you have made to try out a new technique or projects you have abandoned ( telling yourself you would get back to it later) now you can use them. Vicky even showed me a dress designer who is using these ideas in their latest fashion collection. So for the first time in my life I am on trend?


This is the lopsided owl made from lots of motifs sewn together. This is the scumble technique but I have now added him to a clip board. I found a clip board made from fairly stiff but not too thick plastic. Then using my trusty bead awl (any sharp pointed object would do), I made holes all round the edge of the plastic. Then having made a mesh roughly the shape of the board, I stitched it on using the holes. I could have made my life easier by using a clip board without the internal pocket but then I like a  challenge ( like getting this word to line up with the rest of the text)!!!!

It has taken me several days to complete this post because my computer has been used for other things like writing a best mans speech, but this is where I had got to with my latest project when I started the blog. You will see at the end that I have done a bit more since then.


This patch was made mostly, using motifs I had already with some added bits that I crocheted as I needed them to fill in gaps. Can you spot the tiny granny square?


I am not so happy with this one but I can't really explain why, possible because I needed some yellows at the red end of the spectrum ( does that make any sense?). There is also a granny square here. This is turning into wheres granny!


This is my favourite, lots of experiments resulting in a lovely three dimensional finish. I like the colours too.
This one is not attached yet but it was made after Vicky introduced me to the work of Prudence Mapstone. She has published booklets on how to do bullions and spirals and she is an absolute master of free form.


Finally here is th latest version with a blue patch added. You can certainly see that the yellow bit doesn't have the depth of the rest of the project. I think I will try adding some more surface decoration.


The blue bit didn't take long because I had most of the motifs already stashed away. The spiral on the extreme right has little dark iridescent beads sewn all round the dark part - an effect I am really pleased with.

Some things I have discovered: it might seem like a good idea to leave long ends for sewing up later but they really get in the way when you are trying to arrange the motifs before sewing them together. So weave in the ends as you go. Thing two is how useful a large cork board is for pinning the motifs in place so you can look at the effect before finally stitching them together. I have used map pins for this as drawing pins are not really long enough but if you are working on your knees do be careful not to end up as part of the project as the pins can go right through the board and into your leg - believe me I know.
Lynn

Stock Taking and Free Form Crochet.

$
0
0
We have some shows in a month or so, so I thought I had better check on our stock in case we needed to make new things.

First box was full of creatures: don't need mice do need more tiny horses. Definitely don't need any more giant chickens!


The second box was a mistake I should never have opened it - sooo many hats that I e-mailed Vicky to check if it was ok to get rid of some of them. As you know my latest passion is free form and as I sorted out the hats I had a brain wave why not add scrumbles to the plain hats?


This is a little  mottled pink beanie and here it is with a few bits added but I plan to add more. Of course now I can't get rid of the hats!

I have finished the srcumble rainbow. I am really pleased with it. It makes a lovely scarf - even the tassles ( or tassels?) are free form. If I make another one I will make it longer and thinner and perhaps use a smaller range of colours so that it can be worn with a particular outfit.


I have stopped stock taking for now for three reasons:

1. When I opened the the third box I discovered more creatures so I have to sort before I stock take.
2. I have a pile of stuff that I can't put into any particular category/box like these.

You would think I would have made at least a dozen


Perhaps this should be with the Christmas stuff or maybe the Valentines day stuff or then again it could be with the phone/bag charms - I don't think I was meant to be organised.


3. I need to go and scrumble some hats.
Lynn


Free One Row Patterns for Tiny Things.

$
0
0
I know Mums are supposed to teach their children things but since Vicky started to crochet professionally I have learned so much from her! One of the most useful things she has shown me is the thing called the magic circle or sometimes the magic loop. So here are some one row patterns two of which are based on the magic loop:
For them all I used 4 ply cotton yarn and a 2.5mm hook but, as with all my patterns the yarn is not critical as long as the hook you use matches to give a nice firm fabric.
FLOWER
Make a magic loop: 2ch work one treble into the circle, 2ch, ss into the circle. This forms one petal and can be repeated as many time as you like. I have repeated it 4 more times to make 5 petal flowers. Pull the loop closed.  Then I have sewn a bead into the centre of the orange flowers and made some leaves.
HEART
Make a magic loop: 4ch then into the loop work 2tr, 2htr, 2dc, then 1ch, then into the loop again 2dc, 2htr, 2tr. then 3ch and a ss into the loop. Pull the loop tight and you should have a tiny heart. (Vicky showed me this as well)
LEAVES.
Ch 8, turn and ss into second ch from the hook, working along the chain make 1dc, 1htr, 1tr, 1htr, 1dc, 1ss.
You should now have a single leaf which you can use as it is  but if you want a pair of leaves work another 8ch without breaking off the yarn and repeat the pattern. You can do this as many times as you like: in the picture there is one set of four leaves and one set of two to show what I mean.

I have put these on an old pillow case because I think that they will make nice linen decorations.


I had crocheted a centre for these but I had the iron too hot and it got melted - must have been made of some man made fibre. The hearts are made from 4ply cotton. It has just occurred to me that you could make green hearts and they would make nice leaves for some flowers eg. violets.
I will write the pattern for these leaves next time.
I am going to try to put together a collection of one row patterns so watch this space.
My other project this week.
I have had the skeleton for this cat lying about for ages - it is made from 3 bendy hair curlers - so since I am going through a finish your projects faze (AGAIN) I did, finish him that is. Don't you think he looks cheerful and friendly? We have made a number of these for cat owners, mainly  from photographs but I must have had too much wine when I made him because no one has sent me a photo of a green cat.
Lynn

More One Row Crochet Patterns

$
0
0
I promised that I would explain how to make the other type of one row leaves it has proved really quite tricky to put what I do with my hands into words but I have made an attempt - please let me know if it is completely incomprehensible.

 LEAVES OR SEAWEED?
Made using a 2.5 mm hook and some size 5 pearlized dmc embroidery thread.

 Make a 10 chain. Turn and { *work 1dc. in second chain from the hook.
Work a dc in the next two dc.**
ch 4
 turn and repeat from * to **

ss into base of the first leaf }
work a ss into the next three ch (down the stem)
ch 7
 turn and repeat from { to }
 ss into each of the remaining chains down the stem.
 These are the finished leaves but it is the simplest form. If you make a longer starting chain and use a range of stitches to make the leaves you can make more complicated shapes.

I made these leaves using htr, htr, dc, ss.
But why not experiment and share what happens


I have thought of several other things that you crochet with only one row. Here is one but I have three others for the next blog and by then I might have thought of more?

CIRCLES

These are all made with chunky yarn and a 4mm hook.
Small: make a magic loop ch 1 and then work 8dc in the ring. I didn't join with a ss because you get a much neater finish if you join with a sewing needle.
Next size: magic circle 2ch, 10 htr in ring.
Next: magic circle 3ch 12 tr in the ring
Big: magic circle 4ch, 16 hdtr in the ring.

These are the same circles but I just liked the picture and that doesn't happen very often with my photography!
Lynn


Just a quickie

$
0
0
Mum and I have been doing lots of crochet for a new woolly company called Sixpence Designs.  Jane, who is the owner/designer uses exclusively Artesano Aran yarn - partly because they deal in small irregular wholesale orders - take note yarn companies/distributors - but mostly because it comes in absolutely gorgeous colours and is warm and soft.

We have made loads of cot and pram blankets, sofa cushions and floor cushions, toy box covers, nursery chair seat covers, Christmas stockings and bangles for Sixpence.

As is usually the case I forget to take photos to share but Jane has kindly passed on pictures of some of the stock we have made for her.  You will have seen them on Facebook yesterday if you follow us there but they are so lovely I can't resist sharing here too.  Let us know what you think.


You can just see matching cushions peeping out behind!
We can put you in touch with Jane if you'd like to buy any of these
Victoria x


Last of the free one row patterns? Upcycling and a free form bag

$
0
0
 I have thought of a few more one row patterns but I wonder if I am cheating by not counting the foundation chain?

SPIRAL
Use any yarn and a suitable hook.
Make a 30 chain. Tutn make two trebles in the third chain from the hook and then two trebles in every chain until you reach the end, At this point you can make another 30 chain to make the hanging loop or just fasten off.
This is another one of those magic crochet things because with only a little help the piece will make itself into a spiral.

People use them to decorate Christmas trees and I have incorporated them into free-form .
This is made with realy thick yarn. You can see it makes a spiral or an interesting flower.

The flower above reminded me that you can make roses with only one row.
ROSES


ch 22, dc in second chain from hook.  ( work 5 tr in next chain and 1dc in next chain) repeat the stuff in the brackets until you run out of chain. Fasten off and roll the petals around each other to make the rose. When you are happy with the shape stitch it together.
I made these using a 2.5mm hook and 3ply cotton yarn. They would make a lovely corsage don't you think.

DAISIES

make a magic circle ( ch 6, ss  in the circle) repeat this 5 times more fasten off. Sew a bead in the middle to make the centre. 
I made the daisy in the middle with a scrap of tape yarn and the two to the left and right with cream 3 ply wool but they look a bit grubby compared to the pure white in the middle.

You may notice that the greenery around the daisies and the roses looks identical. Well this is mainly because it is! It is the piece that I explained in the last post and it seems to look well with both flowers. I leave the ends so that they are easy to sew on to things. A bunch of these looks fresh and spring like if sewn onto a cotton summer hat.

I haven't just been thinking about one row patterns this week. I have still been experimenting with free form.


I am a great believer in upcycling and recycling and, let's be honest saving money, when I can. So I was in a charity shop the other day and suddenly realised that you can buy bags for as little as a pound and that they have handles that would cost about £5 a pair. I bought two bags with the intention of cutting off the handles
but I got sidetracked into trying to cover one side of the smaller bag with scumbles. The other side is just an illustration of what can be done with one bag of our free form yarn. I have tried to let the thickness of the yarn do the shaping by starting at the bottom with the thickest and the biggest hook and working upwards to the finest yarn and the smallest hook.( I am a bit concerned that my beautiful hand made creations say Dorothy Perkins inside them.)
The photograph on the left was another attempt to improve my photographs but it has ended by looking as if the bag is about to be consumed by mechanical aliens.
By the way there is one draw back to recycling etc and that is that I have a house full of stuff that I can't bear to throw away in case it might be useful and it is starting to be difficult to move freely about the place because of the clutter.
Lynn

More free-form or jig-saw puzzles.

$
0
0
I have been making packets of buttons and beads and winding wool for our free form kits so I have not done much crocheting recently. What I have done has been to work on my addiction.


These are the yarns I am using this time. There are different thicknesses, different fibres and different textures. The beauty of free form is it doesn't matter what you use and it is the perfect way to use up scraps of yarn
 This is the incomplete piece. Some of the scumbles are not yet attached but I suppose it gives an insight into how I work - make a few patches then add them and sew together then make a few more etc.
This started out to be a shawl then I thought cushion but found I had no cushion pads. Then I started to shape it to make a bag , at present I am thinking it could be a jacket. My thinking seems to be free form as well as the crochet!
There is a tiny granny square again so "Where's granny?" continues.


I have decided that there are two ways of doing this kind of work. Some people make a few motifs and then link them together with a crocheted  open mesh, others - like me- use the jig-saw approach. Which is either find a place where the latest patch fits or crochet a patch to fit the space available and any tiny gaps are covered with buttons or beads. I have a bad feeling that this is a bit like cutting off bits of the jig-saw piece to make it fit.
Lynn

A new discovery and another experiment with one row.

$
0
0
I had final information about our next show ( Wokingham on May 5th ) this week so I had to reluctantly withdraw from free-form in order to make a few more bits and look what I discovered.

 It is hard to believe that these hot cross buns can be assembled into the ball shown in the second and third pictures.
 Probably the most satisfying piece of crochet I have done for a long time. I made it and it assembled easily and precisely - really good pattern.

This is an Amish puzzle ball - I found the pattern on line and it is worth googling just to see the amazing variety . My personal favourite is the cross-stitch one with at least four different exquisite flowers on it.


I have also been experimenting with another one row pattern which makes a triangle. These are all the same pattern but different weight yarns and  an appropriate hook. Isn't it amazing how different the sizes are.
Pattern: ch 4 and join into a ring with a ss.
ch 3, 3 tr into the ring, (ch 3, 4 tr into ring ) x 2, 3ch join with a ss to the top of the starting 3ch.


The biggest and the smallest: 6mm hook and super chunky yarn, 3mm hook and 4ply yarn

The other two were made with tape yarn ( red ) and a lovely soft dk. cotton.( blue )


I have just had a lovely day with Ben and Danny and Graham. We have played crazy golf, had adventures in the adventure playground watched snakes and ladders with small boys as the counters, have eaten sausage and chips, watched my grandsons get eaten by a dinosaur and have ridden on tractors which had been cemented into the ground. But the highlight for us all was when grandad made some sand studded with gold and gems. He then gave the boys a bucket of water and my kitchen sieves so that they could pan for gold. I knew my huge bead collection would come in useful, but I never thought they would end up being sieved out of sand!
Lynn

A crochet discovery after 50 years, back copies of magazines and a very large friend.

$
0
0
I am supposed to be an intelligent woman but sometimes I wonder! I like the effect of joining motifs together to make all sorts of things and I have often looked at those throws and bags made from motifs that join only at a few points. But I have shied away from them because I couldn't face the sewing together. There are those of you who are by now thinking why doesn't she join them together as she went along? This is the thing had never thought of it. even after more than 50 years of crocheting! I have a subscription to Inside Crochet magazine and I often get out back copies and look at them again. I found the 'Primrose Throw' in issue 47 which I really wanted to try so I read the pattern and discovered that you can join the motifs as you crochet!!!!

 So if you join the shapes together as you go and you crochet in the ends as you go, the piece is more or less finished when you think you have finished if you see what I mean.


Another co-incidence was that yesterday Vicky gave me some lovely brightly coloured double knitting yarn which I really had to try immediately. So having recently looked through my magazines I remembered the matinee jacket in issue 42 and so  made this.


It is a sweet little sleeveless jacket for spring/summer. You can make it in various sizes but I chose the smallest because it was just an experiment.  Once again I tried to improve my photography by using a pineapple but it makes it look like some kind of animated clothing from a ghost film!
These buttons are gorgeous though made from a deep pink mother of pearl.


So while I was looking through back issues of Inside crochet I remembered another unfinished project. I had run out of yarn so I put this aside while I waited for more to arrive.


It is nearly the pattern from issue 49 made using Drops Delight yarn which is 75% wool and 25% polyamide
and yarn thickness group A. I think this pattern suits this yarn better than the last one I made.

Finally this week a character that most people will recognise. I made him from all kinds of yarn and he is nearly a metre long.

 First he ate 80000 forget-me-nots. But he was still hungry.
 Then he ate 27 teasel leaves. But he was still hungry

He then set off across the patio to find more food................!


I have blue tits nesting in my bird box and when I started taking pictures of this creation they obviously thought all of their Christmases had come at once. They never would have got it through the tiny hole in the front of the box though!
Lynn

Using up scraps of yarn

$
0
0
In the last blog I was explaining a new discovery ( for me ) of how to join motifs together without all the sewing up. So this week, with my green hat on, I have been practising the technique by using up tiny bits of wool . The yarn I have used for this project is all acrylic, double knitting and the amount of each was somewhere between 4 and 4.5 grams. I have noticed that not all dk is the same thickness but this project seems to absorb these differences without distorting.


I have only used about 140g of yarn and I am astounded by how far it goes. 
This scarf/shawl is already 130cm long and about 28cm wide.


These are the tiny amounts of yarn I have used.


Of course if you use little balls of yarn eventually you get left with really small ends ( some less than 30cm long) so I just tied them together and crocheted a circle.


 I havn't decided yet if it will be a purse, a hat, a cushion or a table cover! It just depends on how many short ends Vicky and I can generate.
So give the amount of crochet and knitting we do I guess it could end up being a jumper for a blue whale!
Lynn

Sneaky Peek

$
0
0
I am so excited and relieved.  I have finally finished two projects that have taken flippin' ages!  I feel like I've broken up from school for the summer hols.

The skirt was from a pattern sent to me by the client (sort of - I did jiggle the motif design and slightly adjust the stitch pattern in the main fabric) and the dress is my own design.

I'm a bit unhappy with the photo of the dress which makes it look wide in the shoulders and a bit boxy - it really isn't. It also looks blue.  In reality the colour is a very dark gun-metal grey - gorgeous and very stylish! I'm so proud of them both.  I think they've turned out really well I'm just a terrible photographer.

Sewing the beads onto the dress took nearly as long as the crochet!  There are hundreds and hundreds of them.  I had to put them on afterwards rather than crocheting them in because the beads I liked best had a bore too small for the thread :)

Both are made in Yeoman Yarn.  The skirt is Ecru from their Cotton Club and the dress is made in their Canelle Cotton - main colour 'Storm' now sadly discontinued, second 'frill' in 'Mouse'.

They've been posted and I am nervously waiting for the customer's verdict.  Will she like them?  Fingers crossed ...


Beads and the Memories of Inherited Crocheting.

$
0
0
I sometimes think there is some telepathic link between me and my daughter. I have just been photographing my latest crochet discovery which involves beads only to find that part of Vicky's post is about beading too. I am almost too embarrassed to put my efforts next to her glorious grey beaded dress - I have seen it in the flesh so to speak and it is truly beautiful. If I had put the amount of time and effort into making such an heirloom I would not let it out of my sight - the person who commissioned this piece is getting something amazing. Not only that but Vicky has made the same person that lovely cream skirt she is a very lucky lady in my opinion.

Anyway I said almost  too embarrassed, so here is what I have discovered and been practising this week:  in the past I have made lots of pieces that involve beads but I have always either sewed them on afterwards or threaded them on the yarn before I started crocheting. Now I have realised that if you have fine enough yarn and a small hook you can crochet the beads in as you go along.


The thickest yarn used here is gold coloured, stranded embroidery thread - perhaps a yellow background was a bad choice for golden thread? The pink and the grey/ silver threads are fine crochet cotton about gauge 10 I should think. The technique is to make a foundation chain and then where ever you want a bead you push the hook through the hole in the bead, pick up the yarn and pull a loop through the bead and then yarn over hook to complete the double crochet. In between the beads I have worked double crochets, somewhere between 2 and 5 between each bead. As you can see from the pink bracelet I havn't got it quite right yet - not all of the threads that make up the dc are on the same side of the bead.

I am still excited by the fact that I can discover new techniques, new textures and some of the new yarns are incredible. In my last blog I was saying that after 50 years I was still finding out new things and Crochet Concupiscience made a really nice comment, but to be truthful I am 65 years old and was taught to crochet by my grandma when I was about 10 (or younger) so I reckon my maths tells me that it is more like 55 years that I have been crocheting - good grief! I may have been taught by my grandma but my mum was an amazing crafter who moved my skills on past just making trebles and chains.  I was reminded of her crocheting skills when I came across this pattern for a flowery dress.


Believe it or not my mum made this for me when I went off to university - it was made in deep pink with a pale pink lining. I loved it but it had two problems one was that at the time skirts were getting shorter and whenever I washed it it got longer so I  removed a row of motifs about once a month. The second thing was that from a distance it looked as if I was wearing nothing underneath - I am absolutely certain that was not my mum's intention  - but I didn't mind!
Lynn
p.s I have just remembered that it was obviously not just me that loved it because eventually it was stolen from the university drying rooms - I am still annoyed!

Crochet logo, rainbows and tablet covers again

$
0
0
Less than a week to the next fair at Wokingham -May fair on the 5th. If any of you are passing please say hello. We will be the ones with the banner saying String Theory Crochet - surprise. Our stall is by the steps near Argos and near two coffee shops -hooray.
Anyway as you can imagine I have been making a few bits for the fair and finding all the things we use to dress the stall. Most were put away in the loft to make room for Christmas and I am still looking for them! You really would't believe the state of our attic.
These are what I have been making -


These are a few tablet cases which seem very popular at the moment -  I use mine all the time, in fact my Nexus is the model for the photograph above. The trouble is they are all different sizes so in a previous blog I explained how to make a cosy for any size of tablet. All except the yellow one are made with super chunky tarn and a 4mm hook to give a firm fabric and lots of padding. The yellow one is dk but I have lined it so the tablet is safe.


Once again Vicky put this idea in my head - I had been thinking for some time that we needed a 3D version of our logo and she said she was going to have a go at making one, so I thought I could help out by making one for her. Then I started to wonder should it have a mouth? Is the hair right? Should I have given it a basket, should it have a name (suggestion from someone was Needle and Fred ). So think of this as the prototype.
I have used the birth of a new member of the team to do some more photography experiments:

Surrounded by tubes of rainbow yarn which we are now selling for scumbling and making the motifs for the throw/scarf that I shared in a previous blog. The pattern will appar soon.


Piles of yarn?


Surrounded by rainbows?


My computer is once again causing me much pain so I will have to publish the pattern for the motif in the next posting. I think the machine is suffering from old age and lack of memory . Very much like its owner!
Lynn


A Successful Day

$
0
0
We had a very successful day at the Wokingham May Fair but very tiring in fact we are still recovering.  
Best of all we met some really lovely people who were complimentary about our work and some who were as mad about crochet as we are.


Now I know there are sayings about bad workmen blaming their tools but I am trying to do this on Graham's laptop so please forgive any glaring errors. My own machine has absolutely no display so I can't even access the motif pattern that I promised.


At the fair we sold all sorts of things but the oddest was purchased by a little girl who wanted to buy one of these. They are baked bean cans which we made to display crochet hooks. I felt I couldn't sell her the can because it might be dangerous so she took just the covering with a view to finding a jam jar to cover herself
I made these using a 3.5mm hook and double knitting.


40 chain is about right to go round the tin. then two rows of trebles in each colour. When the piece is long enough the last row is (2dc then dc2 together) all the way to the end of the row and fasten off. Stitch the red row together then add a bead to every other row as shown in the picture. Now put the cover on the can and stitch the blue row together and use the beads to button the cover down the front.

 Made for a child because we sold several last Monday. I used dk cotton . It has a rolled brim which can be worn up or down.

I decided these were not good photographs so I went off to find a stand and while I was away this happened:

Vicky's lunatic brother trying to get his head in a very small hat. The following are much better I think:

 Although perhaps I should have brushed her hair.
Of course all this got me thinking about hats. So here is my hat parade -get it?


Yoda is my absolute favourite and it doesn't really matter how often I block his ears they always revert to sad and depressed mode. Anyway our next fair is at Hurst on the 28th and 29th of June. We will be having a hat sale with many of out winter hats at reduced prices.

One more head related thing and it is these that Vicky made:

Lovely crowns and tiaras suitable for any queens and princesses that may need them.


One of the things that seems to sell well are these packets of buttons - please notice the continuing rainbow theme.

 Havn't got any indigo or violet so I have improvised!
They do come in all shapes and colours though.


And finally another of those signs that I am aging rapidly. I wanted some safety eyes to make the logo with. So I ordered some, then I forgot I ordered them and made some out of felt. But the real problem is that while I was on the site ordering the black and white eyes I ordered a few more!


Do you think I might have over done it?
Lynn


Beaches and Creatures

$
0
0
Graham and I have just come back from Jersey (the Channel Island not the knitted version). We had an amazing week lovely place, lovely people and the beaches are to die for.
Just two examples but there are many more. Please note the lack of people, the only time we saw more than 5 people on the beach was on Saturday when the weather was even more amazing than the rest of the week.


Not much crochet this week but I said last time that I had ordered too many eyes so here I am trying to use them up:

This is real free-form crochet I just made them up as I went along -which is always good fun because the result is such a surprise. The square one looks as if he is dancing but I think I am going to have to give him a mouth. The surprised eyes make him look as if he is desperate to say something.


This one is made from sightly thicker yarn and I made the arms, legs and hair? as I crocheted the two halves together. Wouldn't he make a lovely sun if he was made in yellow or orange.


This is a commission that I started before we went on holiday. it is made from pink acrylic dk.

I am very pleased with the effect - very cute and completely unique.

I know I have promised several times to publish a motif pattern but I seem to be unable to do it in this format so all I can say is if you would like a copy please get in touch and I will e-mail it to you.

Last thing before I fall asleep at my computer is just another example of the practicality of crochet. On the beach the wind kept blowing my hair in my face, so that I couldn't see and kept tripping over things. So during the evening I made a quick hair band - problem solved. 
You didn't really think I left home for a whole week with no hooks and yarn did you?
Lynn


Chaos and Calm Caused by Crochet.

$
0
0
Do you ever have days when your head is teeming with ideas and you flit from one to the other without completing anything? In my living room, which is where I work, you will find the following: a pot full of blue snakes with googly eyes (still need to make more of these), a new flower pot for covering, a corrected pattern for me to try, the 3D logo sitting in a pot full of beads, some incomplete evil minions and masses of wool, beads buttons and ribbons waiting to be packaged. I wish that this was a complete list but there is so much more. I will take photos for the next blog to illustrate the chaos.

This fits with the theme - lovely organised rainbow covered bean can filled with chaotic flowers and butterflies stuck on lolly sticks and coffee stirrers. All very green!


 Another hat. Bear in mind that the head is a small version of the famous Girls World, so this is actually made for a small baby.
Vicky had two girls world heads when she was little - one blond and one brunette. I am sure she will be really glad I have told everybody!
The brim can be worn up or down. Chaotic hair tidy hat ?
I have always put flowers on the brim or round where the brim meets the hat - thought I would try something different this time - what do you think?


Now am I going back to tidying the chaos that is my house or the calm and order that is crochet? No contest!
Lynn

Crochet Obsession a Guilty Secret?

$
0
0
The following will prove that crochet is not just my hobby and my passion but it is an obsession, and an addiction that is taking over the whole house.

 In one corner of the living room we find: Tubes of yarn which we are selling at the moment for people who want lots of textures and fibres and thicknesses without buying whole balls of yarn.
Also the logo -still nameless sitting on a bowl of beads waiting to be packaged! The beads that is.
This is the table on the right hand side of the chair I work in: Blue snakes/ worms, some flower pot or row markers for gardeners.
The red zip up purse is a kit for making motifs.
 This is the surface of a wheeled set of drawers on the left hand side of my chair. Here we have: an unfinished eye, the set of coasters that I am working on , some flowers for sticking on row markers (garden not knitting), a soft cotton wash cloth and a covered flower pot.
 On the main table are some lady birds waiting to be adjusted
 And packets of beads, buttons and toy eyes. I wonder if the lottery ticket is a winner. If it was I wouldn't stop crocheting.
Set of shelves with buttons and beads waiting to be packaged.


To be honest I havn't shown you the stash of wool, the sewing machine, Grahams spinning wheel and the piles of crochet books and magazines.

I have probably said that Vicky and I are both ex-teachers so at this time of year I try to think of pretty and useful gifts for teachers. Once more this is inspired by 'Inside Crochet'

This is a prototype and I have put the pot containing the plant inside the pot that I have covered but I hope it gives an idea.

The flower has a tiny silver thank you attached but you could write any message on the white plastic stick.

I have shown you some of the living room but most of the rest of the house has craft of some sort in every possible corner. Maybe if I win the lottery I should buy a second house - one to live in and one to crochet in or would they be the same house?
Lynn


Photographing Coasters and A Crochet Purse

$
0
0
After a few lovely days it rained yesterday which meant I could crochet all day. So I finished the coasters and used the same technique to make a purse.

In my quest to take good pictures first I tried the newly scrubbed table.
 Then I tried the patio. It was at this point that I thought that having used tiny old glasses that even these mini bread sticks are out of scale and look a bit like telegraph poles.
So I tried a close up.
 And back to the table, with a small pot plant and a pile of coasters.
This shows the whole set. They are made from dk cotton using mainly half trebles and trebles but the effect is achieved by crocheting into the row below and lengthening the stitch. I also crocheted mostly between the stitches rather than into the top of the stitch.


Having found a new technique I had to apply it to something else:

Pretty purse that I was so please with that I decided to make it really luxurious with a soft felt lining.
It uses the same sort of cotton as the costers and a purse clip with plastic bobbles.


Here is the lining and looking at the picture I can see that I have left the tacking threads in the lining .


I am going to make another one of these because it is one of those things that when it is finished you cannot bear to give it away. This feeling doesn't occur often but I crochet so much that it goes part way to explaining why the house is full of crochet.
Lynn


Viewing all 226 articles
Browse latest View live