In our last post I promised to publish the pattern for the bunny or chick basket. Have a look at the previous post to see the possibilities but here is the pattern.
![]()
Materials: a very small amount of yarn. I used cotton double knitting and a 3.00 mm hook.
If you change the yarn change the hook so that you get a fairly firm fabric.
I made the eyes using white felt and two small blue buttons but there are other methods in the previous post. You will also need a small pink bead for the nose and some black sewing thread.
![]() Make a magic circle and ch1 this does not count as a stitch.
Make a magic circle and ch1 this does not count as a stitch.
![]() Row 1: make 8 dc in the circle and join with a ss to first dc.
Row 1: make 8 dc in the circle and join with a ss to first dc.
![]() Row 2: 1ch and 2dc in the same place as the join. 2dc in each stitch to end of row this should give you 16 dc.
Row 2: 1ch and 2dc in the same place as the join. 2dc in each stitch to end of row this should give you 16 dc.
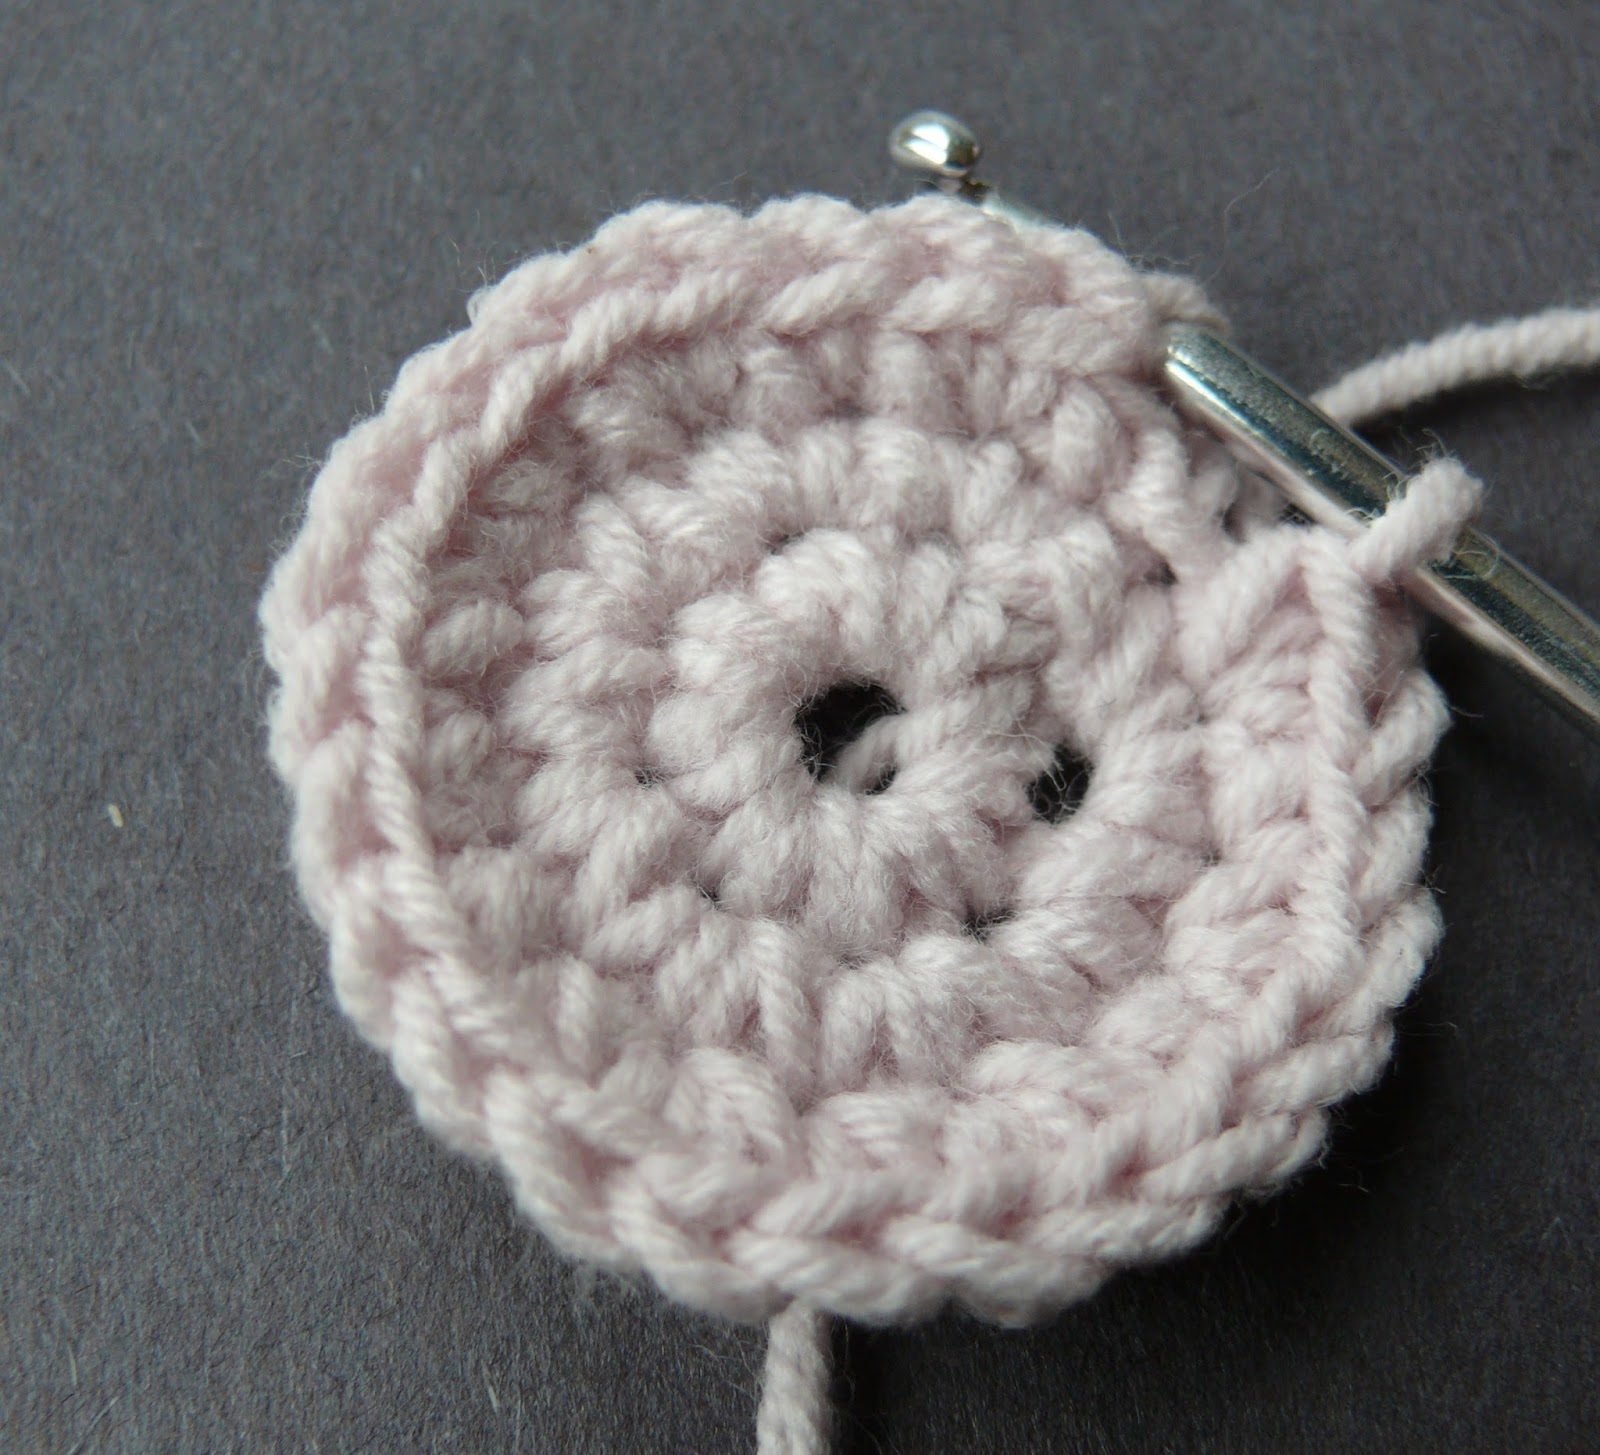
Row 3: 1ch and 1dc in the same place. (2dc in next stitch 1dc in next stitch) repeat this 6 more times 2dc in the next stitch. NOTE join to first dc using only the back loop. (24 dc)
![]() Row 4: 1ch and using only the back loops throughout this row 1dc in same place 1dc in each stitch to the end ss into first dc
Row 4: 1ch and using only the back loops throughout this row 1dc in same place 1dc in each stitch to the end ss into first dc
Row 5: 1ch and 1dc in the same place 1dc in each stitch to the end of the row join with a ss.
![]() Row 6: 1ch and 1dc in the same place 1 dc in next 6 stitches 2dc in next stitch. ( 1dc in next 7 stitches 2dc in next stitch ) repeat this once more and join with a ss. (27 dc)
Row 6: 1ch and 1dc in the same place 1 dc in next 6 stitches 2dc in next stitch. ( 1dc in next 7 stitches 2dc in next stitch ) repeat this once more and join with a ss. (27 dc)
Rows 7 and 8 repeat row 5
Row 9: 1ch and 1dc in the same place 1 dc in next 7 stitches 2dc in next stitch. ( 1dc in next 8 stitches 2dc in next stitch ) repeat this once more and join with a ss. (30 dc)
row 10 and 11: repeat row 5
![]() Row 12: you can work either a row of slip stitches all round before fastening off or a row of crab stitch
Row 12: you can work either a row of slip stitches all round before fastening off or a row of crab stitch
![]()
This is what crab stitch looks like.
![]() EARS/HANDLES make two
EARS/HANDLES make two
ch 4
Row 1: work 1dc in second ch from hook then 1dc in remaining two ch.
Rows 2 to 7: ch 1 work 1dc in each stitch (3 dc)
If you are making a chick ignore rows 8 on wards and just repeat row 2 another 10 times.
![]() Row 8: ch 1 dc two tog. 1dc (2dc)
Row 8: ch 1 dc two tog. 1dc (2dc)
Row 9: ch1 dc 2tog. (1dc.)
![]() Row 10 to 16: ch 1 1dc turn Fasten off
Row 10 to 16: ch 1 1dc turn Fasten off
![]() To Make up.: Weave in loose ends. Stitch ears as shown in the photo and then stitch them to the inside of the basket NOTE try to have the seam of the basket at the opposite side to the ears.
To Make up.: Weave in loose ends. Stitch ears as shown in the photo and then stitch them to the inside of the basket NOTE try to have the seam of the basket at the opposite side to the ears.
![]()
![]() Stitch the other end of the ears to the back of the basket and your basket is complete it is up to you how you decorate it and what you put in it.
Stitch the other end of the ears to the back of the basket and your basket is complete it is up to you how you decorate it and what you put in it.
If you are making a chick sew the handle on from side to side rather than front to back..
Chick wings: ( make two )
chain 5.
dc in second chain from the hook dc in each chain to end (4 dc)
ch 1 dc 2 tog dc in each stitch to end (3 dc) . Repeat this row twice more and fasten off. Stitch the wings about half way down the basket sides directly underneath the handle (on either side ).
Use the photographs in this blog and the previous one as a guide to how to make the faces
Or you could decorate with small flowers or beads.
As I keep saying I am out of my comfort zone when writing patterns so if you need any help please get in touch.
Lynn

Materials: a very small amount of yarn. I used cotton double knitting and a 3.00 mm hook.
If you change the yarn change the hook so that you get a fairly firm fabric.
I made the eyes using white felt and two small blue buttons but there are other methods in the previous post. You will also need a small pink bead for the nose and some black sewing thread.


Row 3: 1ch and 1dc in the same place. (2dc in next stitch 1dc in next stitch) repeat this 6 more times 2dc in the next stitch. NOTE join to first dc using only the back loop. (24 dc)

Row 5: 1ch and 1dc in the same place 1dc in each stitch to the end of the row join with a ss.

Rows 7 and 8 repeat row 5
Row 9: 1ch and 1dc in the same place 1 dc in next 7 stitches 2dc in next stitch. ( 1dc in next 8 stitches 2dc in next stitch ) repeat this once more and join with a ss. (30 dc)
row 10 and 11: repeat row 5


This is what crab stitch looks like.

ch 4
Row 1: work 1dc in second ch from hook then 1dc in remaining two ch.
Rows 2 to 7: ch 1 work 1dc in each stitch (3 dc)
If you are making a chick ignore rows 8 on wards and just repeat row 2 another 10 times.

Row 9: ch1 dc 2tog. (1dc.)


If you are making a chick sew the handle on from side to side rather than front to back..
Chick wings: ( make two )
chain 5.
dc in second chain from the hook dc in each chain to end (4 dc)
ch 1 dc 2 tog dc in each stitch to end (3 dc) . Repeat this row twice more and fasten off. Stitch the wings about half way down the basket sides directly underneath the handle (on either side ).
Use the photographs in this blog and the previous one as a guide to how to make the faces
Or you could decorate with small flowers or beads.
As I keep saying I am out of my comfort zone when writing patterns so if you need any help please get in touch.
Lynn